
Sparkly Winter Process Art for Preschoolers
Winter process art lets preschoolers explore snowy colors, ooey-gooey textures, and sparkling effects, and without worrying about making something “perfect.” If you’ve ever wanted a winter art activity that keeps little hands busy and builds real developmental skills, this is it. Be sure to check out all our preschool process art activities.
Many winter crafts focus on copying a model. Process art flips that idea. Instead of following directions step-by-step, children play and experiment, make choices, and discover what happens when materials interact. That freedom to create and play matters.
This sparkly winter process art activity has been a classroom favorite for years because it’s simple to set up, deeply engaging, and adaptable for a wide age range—from toddlers with support to early elementary kids.
What You’ll Learn
- What winter process art is (and how it differs from crafts)
- Why process art is developmentally appropriate for preschoolers
- The skills children build during open-ended winter art
- How to create sparkly winter paintings without glitter
- How process art fits into a complete preschool winter curriculum
A Done-For-You Way to Teach Winter Through Art
If you love activities like this but don’t want to plan everything from scratch, these kinds of open-ended, skill-building experiences are woven throughout our seasonal lessons, like our Winter Learning Activities Bundle.

One of the prominent highlights of this time is the inclusion of winter process art activities. These simple yet creative winter paintings are an integral part of our seasonal preschool curriculum, designed to engage young learners in the fun and spirit of winter.
These winter paintings are for kids of all ages, but especially appropriate for preschoolers and toddlers. While being entirely process-oriented, they never fail to yield beautifully shimmering keepsakes that parents and grandparents treasure.
Other favorite kids-made Christmas gifts include our Sparkly Christmas Process Art and Winter Art Project for Preschoolers.
The key materials needed to create these frosty masterpieces are tempera paints, liquid glue, and Epsom salt. When combined, these elements produce a sparkling frost-like effect, turning each painting into a dazzling spectacle of winter magic.
What Is Process Art in Preschool?
Process art focuses on the experience of creating, not the final product. There’s no sample to copy and no “right” outcome. Instead, children explore materials in their own way, by mixing, squeezing, swirling, and just messing around a little bit.
In winter process art, that might look like:
- Mixing blues and whites to create snowy skies
- Squeezing glue in long trails across wet paint
- Sprinkling salt and watching textures change as it dries
The learning happens during the process, not at the end.
Developmental Skills Built Through Winter Process Art
Winter process art activities support multiple areas of preschool development at once:
- Fine motor strength – squeezing glue bottles, gripping brushes, sprinkling salt
- Hand-eye coordination – controlling movement across the paper
- Sensory exploration – observing texture, color blending, and cause-and-effect
- Creative confidence – no pressure to “do it right”
- Problem-solving – deciding where to paint, glue, or sprinkle next
These skills directly support early writing, self-help skills, and classroom readiness.
Epsom Salt Winter Process Art Paintings
Who knew winter process art could create beautiful, frost-like pictures that perfectly capture the essence of a cold, frosty winter morning!?
Materials
- washable tempera paint, paint brushes, and paint palettes
- thick art paper
- Epsom salt
- white liquid school glue
The Set Up
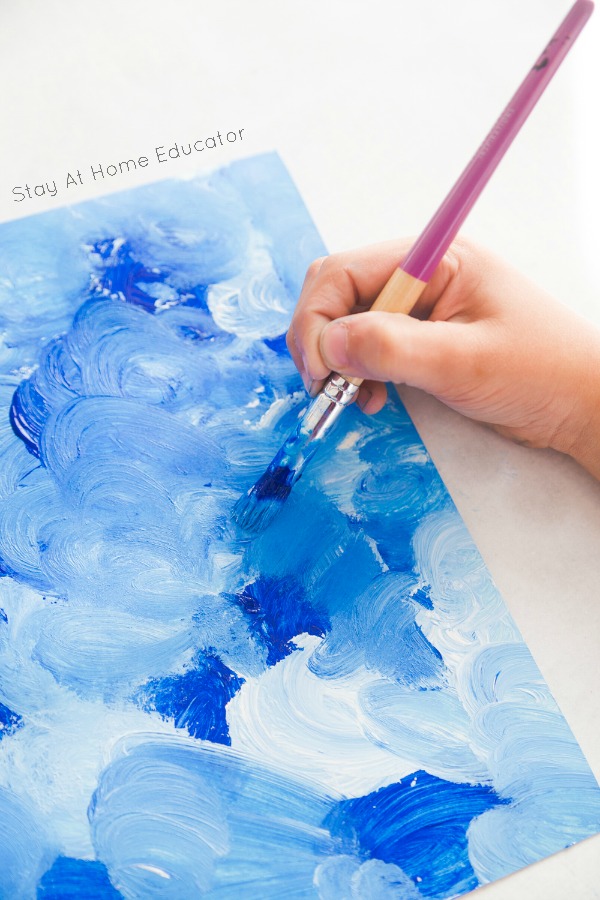
Begin by dolling out a few dollops of paint to each child. Because we had been studying all things winter in preschool, my students chose blue and white paint. I invited the students to begin painting, allowing them to mix the white and blue paint as they wanted on their paper.
Sparkly Winter Paintings for Preschoolers
This student made “swirls of snowflakes” inspired by some books about snowflakes we had read during our winter preschool theme.
My preschoolers swirled and spun and twisted their paintbrushes making a blue-gray background, just like the way the sky looks on a snowy day.
Before the paint has a chance to dry completely, squirt on some white liquid school glue. Squeezing on the glue while the paint is still wet will cause it to react a bit with the paint as it dries, changing the blue paint under the glue to a purple hue.
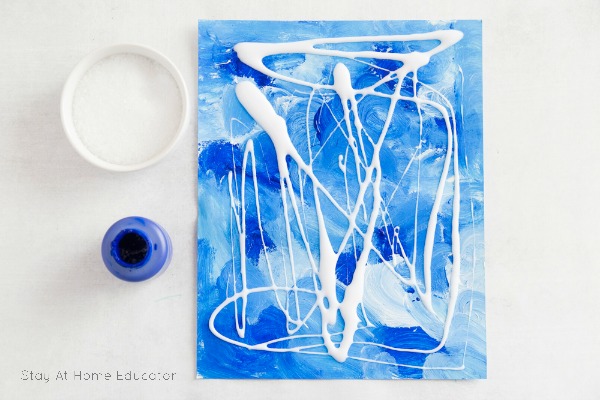
The students love this step! Because how often do children have the opportunity to just squeeze out ooey, gooey glue?
Usually, we say rhymes like, “Just a dot, not a lot”, like in this back-to-school worksheet that teaches glue control, but that’s not needed here. We want trails of glue all over the paper!
You want your preschoolers to squeeze hard and use a lot of glue.
And it makes them better writers, too, since squeezing the glue bottles strengthens their hand muscles.
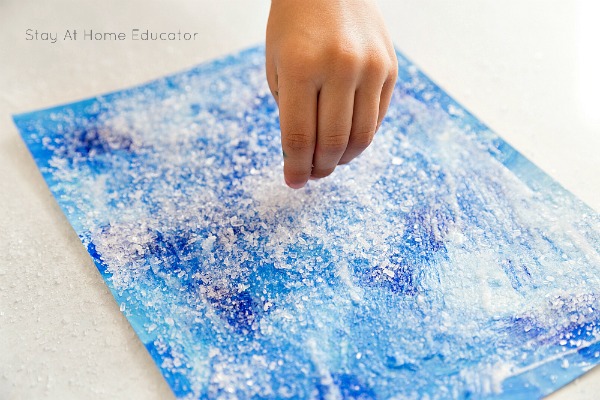
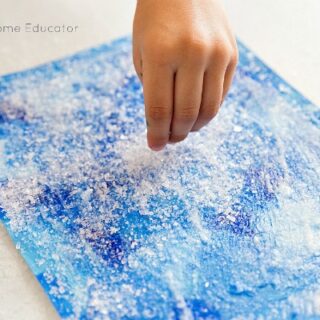
Finally, sprinkle some Epsom salt over the glue.
Why Epsom Salts Instead of Glitter?
Epsom salts have a larger crystal than regular table salt or even kosher salt, and without the clingy mess of glitter. Benefits of using Epsom salt in art include:
- Easier cleanup (no static cling)
- Strong visual impact
- Better for sensory exploration
- Less environmental mess than glitter
Note: Epsom salt is not edible, so close supervision is important, especially with younger children.
Adapting This Winter Process Art for Toddlers to Kindergarten
The best part of winter process art projects like this one is that, with the right supervision, it is suitable for all ages.
- Toddlers: Use thicker paper, pre-open glue bottles, and provide hand-over-hand support
- Preschoolers: Encourage independent squeezing, color mixing, and salt sprinkling
- Kindergarten: Add discussions about texture, winter weather, or pattern creation
This flexibility is what makes process art so valuable in mixed-age settings.
Even my barely toddler, with me by his side supervising him, completed his very own sparkly winter art piece. On the flip side, this is just the kind of art my 8-year-old would be into as well.

More Winter Art Projects for Preschoolers
Here are some other well-loved, tried and true winter themes art activities your preschoolers are sure to love!
- Winter Snowball Fine Motor Paintings
- Winter Cookie Cutter Process Art
- Topographic Melting Snowman Craft
- Paper Plate Snowman Craft
- Fine Motor Winter Process Art for Toddlers
- Snow Paintings
- Melting Snow Process Art
- Winter Watercolor Paintings for Kids
FAQ: Winter Process Art for Preschool
Winter process art works well for toddlers, preschoolers, and even early elementary children with small adjustments. Toddlers benefit most from the sensory experience and will need close supervision, thicker paper, and help with squeezing glue bottles. Preschoolers can participate more independently by mixing paint colors, controlling glue flow, and sprinkling salt themselves, which strengthens fine motor skills. Kindergarten-aged children can extend the activity further by discussing texture, color blending, and winter weather concepts. Because process art focuses on exploration rather than a perfect outcome, it naturally adapts to a wide range of developmental levels.
Process art and crafts both have value, but process art plays a particularly important role in early childhood. Process art emphasizes creativity, decision-making, sensory exploration, and motor development because there is no model to copy or specific end product to recreate. Crafts, on the other hand, focus on following directions and producing a uniform final result. In preschool, children benefit most from open-ended experiences that build confidence and foundational skills, which is why process art is often recommended as a primary art approach during the early years.
You can use table salt, but the finished effect will look different. Epsom salt has larger crystals, which create a more dramatic, sparkly texture that resembles snow or frost when it dries over glue. Table salt produces a finer, more subtle texture that is less noticeable from a distance. If you are aiming for a bold winter effect without using glitter, Epsom salt typically produces stronger visual results. Regardless of which type of salt you choose, supervision is important since salt is not meant to be consumed.
Winter process art is messy in a developmentally appropriate and purposeful way. Children will be mixing paint, squeezing glue, and sprinkling salt, which can lead to spills if the environment is not prepared. The mess can be managed by covering tables, using trays under each project, and providing smocks or old shirts. The sensory exploration is part of the learning experience, and when expectations are clearly set, the activity remains manageable while still allowing children the freedom to explore.
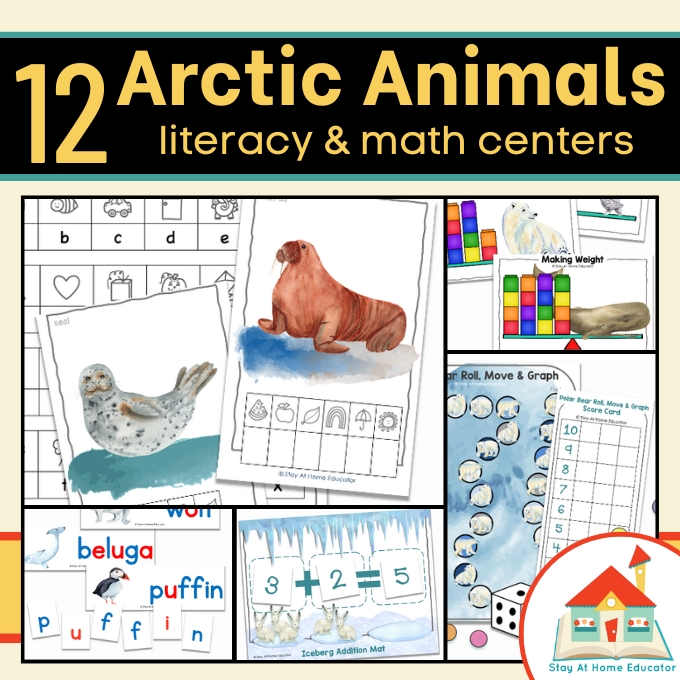
Shop our Winter Preschool Centers
Engaging, hands-on activities for early literacy and math skills.

Sparkly Winter Process Art for Preschoolers
During winter, there is nothing quite as magical as a sparkly blanket of fresh snow.
Your preschoolers can create their own beautiful snowy masterpiece with this preschool process art activity.
I always include several winter process art activities during the cold months.
They are the perfect indoor activity and help keep kiddos excited about the chilly winter months.
This particular activity requires a few basic materials and is easy, fun and magical!
Materials
- washable tempera paint
- paint brushes
- paint palettes
- thick art paper
- Epsom salt
- white liquid school glue
Instructions
- Prepare all the materials in your art space ahead of time, so your preschoolers can jump right in when you invite them to start.
- Begin by dolling out a few dollops of paint to each child. I use white and blue paint for this activity.
- Invite the students to begin painting, allowing them to mix the white and blue paint as they desire.
- Encourage your children to swirl, twist, and spin their paintbrushes making a blue-gray background (will resemble a snowy sky).
- Before the paint has a chance to dry completely, squirt on some white liquid school glue. (Doing this while the paint is still wet will cause it to react a bit with the paint as it dries, changing the blue paint under the glue to a purple hue.)
- Encourage your preschoolers to squeeze hard and use a lot of glue. They typically LOVE this step, since they are taught to "go easy on the glue".
- Finally, sprinkle some Epsom salt generously over the glue.
- That's it! It's time to marvel at the beautiful sparkly winter wonderland creations!
Notes
Epsom salt is NOT edible (not the same as table salt), so make sure your curious kiddos do not put it in their mouths!
Recommended Products
As an Amazon Associate and member of other affiliate programs, I earn from qualifying purchases.


Winter Theme Picture Books
High-quality thematic picture books can significantly enhance any preschool activity by providing a rich, engaging context that sparks children’s curiosity and imagination.
These books can help to deepen kids’ understanding of the activity at hand, stir their creativity, and provide a meaningful connection between the real world and the concepts they are learning.

I’m Sarah, an educator turned stay-at-home-mama of five! I’m the owner and creator of Stay At Home Educator, a website about intentional teaching and purposeful learning in the early childhood years. I’ve taught a range of levels, from preschool to college and a little bit of everything in between. Right now my focus is teaching my children and running a preschool from my home. Credentials include: Bachelors in Art, Masters in Curriculum and Instruction.
These turned out so great! My students had a blast and parents loved them! We made them for spring and used lighter colors.
Okay I LOVE this idea. Letting kids just create without worrying about making it “perfect” is everything. Definitely trying this!
How long should you let the paint dry before putting on glue?
How long should the glue dry before putting on the epsom salt?
Winter process art snowflake project
How long you wait for everything to dry is up to you. I find that is the paint is a little wet the glue reacts a bit and makes the paint bleed into a purple, which is fine with me. But, the downside is that the epsom salt can sometimes stick to the paint. I wouldn’t let the glue dry at all before sprinkling the lines with the epsom salts. But reallym since this is process art, you can do this however you please!
Was wondering if I could use something other than epsom salt?
Sure thing. Any kind of salt will work. And of course, glitter would be pretty, too!
How long does it take for the colors to react to the glue? Our paintings are drying and no color change (purple) so far. We used washable tempera paint and washable Emler’s School glue
You know, I think it might be related to the brand, as I have had a few people mention the lack of color change. I use Colorations brand, available on Amazon and Discount School Supply. I’m thinking that the colors reacting with the glue has to do what the make-up of that specific tempera paint.
From looking at the blue paints you used one is a darker blue that may in fact have a little red in it…almost a very dark purple. Only a paint that had some red and blue in it would make the light purple when mixed with white glue. A true only blue paint would only make light blue! Hope that helps!
Do you shake off the excess Epsom salt? If so …when?
After the glue and paint dries, you can shake off the excess salt.
DO you spread the glue for this project or just let the kiddos pour it on and then sprinkle salt.
I let the kiddies squeeze it on themselves. Squeezing is so good for children because it strengthens their hand muscles. BUT, do be prepared for the children to use a lot of glue!
But do the children SPREAD the glue with a brush after they squeeze it from the bottle?
They can, but my students didn’t. If the paint is still a little wet, the salt will stick anyway.
I tried this today with my preschoolers. Not sure what went wrong but the Epsom salt melted all over the glue and created water all over the pages.
Very disappointing result. Not sure where we went wrong tough…!!!
Wow! I’m so sorry that happened. I have used various salts with glue before and never had the happen! Maybe we used different glues?
Same results here. I’m thinking maybe letting the paint dry a little before applying glue and doing the same with the glue before applying the salt.
These are just so beautiful! I can’t wait to give them a try!
Always looking for simple but creative craft ideas for my charges. As a nanny it is hard to find things that a 2 year old and 5 year old can do together. The epson salt paintings were great. Thanks for the idea.
That’s just one of the reasons I love those paintings!
Can acrylic paint be used? Instead of the tempura paint.
You can use acrylic paint. In fact, it might even turn out a little better because acrylic is thicker and doesn’t blend as easily. BUT, acrylic paint is not washable. So if you use it with your preschoolers, make sure they are wearing smocks.
I’m curious if this would work on canvas?
I’m certain it would, however you would want to use a high quality tempera paint or acryllic paint.
Thank you for this wonderful project. We used feathers to paint instead of paintbrushes. My pre-kinders had so much fun.
I’m so glad they enjoyed it, and how creative to use feathers!