
Winter Process Art for Toddlers (That Builds Real Developmental Skills)
Winter can feel long, especially when you’re trying to keep toddlers engaged indoors. You want winter preschool themes that feel meaningful, and art experiences that support development without requiring perfect results or complicated prep.
That’s where winter process art for toddlers shines.
Process art focuses on how children create, not what the final product looks like. During the winter months, these open-ended art experiences give toddlers a powerful way to explore sensory materials, strengthen fine motor skills, and express creativity
In this guide, I’ll walk you through a simple but stunning winter process art activity that works beautifully for toddlers and preschoolers and fits naturally into your winter preschool themes.
What You’ll Learn
- What makes winter process art different from crafts
- Why process art is ideal for toddlers’ development
- How to set up an easy-peasy winter art activity
- A step-by-step gift card painting technique toddlers love
- Ways to adapt this activity for toddlers and preschoolers
- How to extend process art across your winter preschool theme
Bringing It All Together in Your Winter Curriculum
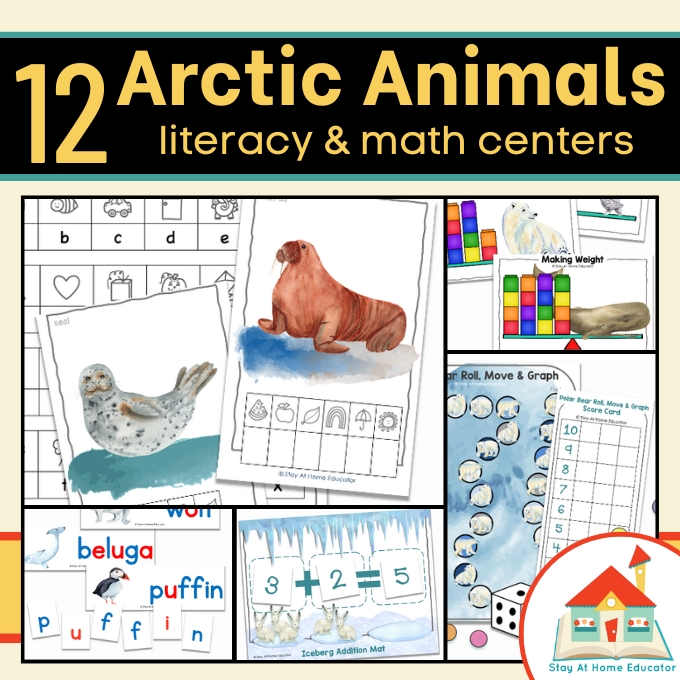
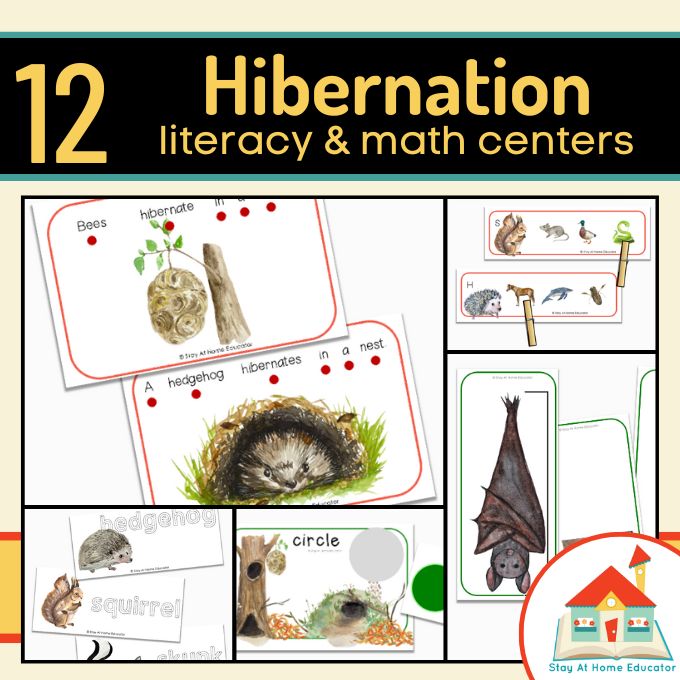
If you love offering rich, open-ended activities but want them organized into an easy-to-use system, this is exactly how I designed my Winter Friends Preschool Centers. They’re play-based, skill-focused, and realistic for real classrooms and homes.
What is Process Art?
By definition, process art emphasizes the act and process of making art over the product produced. It is open-ended, self-motivated and based on experience and experimenting. Characteristics of process art include:
- no specified outcome
- no step-by-step instructions
- no sample for children to follow
- work is entirely of the children’s own choice
Wondering about process art at its most basic? Check out this Big Scribbling – Simple Art for Toddlers.

And this winter process art for toddlers is beautiful to boot, too! Just look at that! Like I said…frame worthy!
Why Winter Process Art Is Important for Toddlers
Winter process art supports multiple areas of early development at once—making it far more than “just art.” Benefits include:
- Strengthening fine motor skills through squeezing, scraping, and spreading
- Supporting cognitive skills like problem-solving and experimentation
- Encouraging language development as toddlers describe what they’re doing
- Promoting emotional regulation, focus, and confidence
- Offering sensory input that’s especially helpful during indoor winter months
This is why organizations like NAEYC consider process art developmentally appropriate for young children.
Read this: Stamping Snowflakes Winter Process Art
Winter Process Art for Toddlers: Ice Painting with Gift Cards
This winter art activity creates a beautiful, icy effect while remaining fully open-ended and toddler-friendly.
Materials
- 8×10 canvas boards
- washable tempera paint
- empty gift cards
- liquid glue
- paint brushes
- course iridescent glitter (or Epsom salt if you don’t do glitter)
- snowflake confetti
The Set Up
- Place one canvas board on a tray for each child.
- Offer paint bottles and an empty gift card.
- Invite toddlers to explore—no demonstration required.
Tips to Minimize Mess:
- Use art smocks to protect clothing.
- Work on trays, like these food trays.
- Embrace a little chaos. It’s all part of the fun!
How to Do the Gift Card Painting Technique
This technique is simple, open-ended, and perfect for creating a frosty “cracked ice” look—without turning it into a craft.
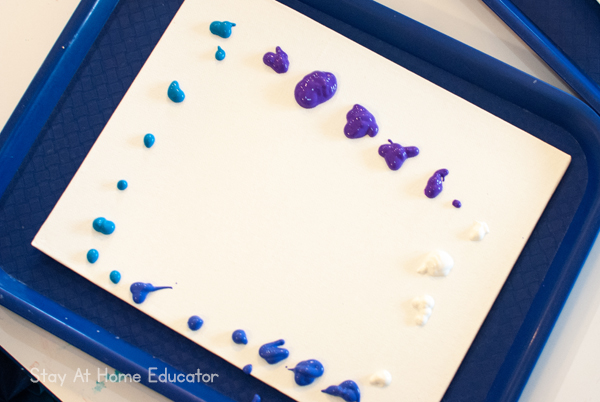
Step 1: Add the Paint
Invite toddlers to squeeze paint directly onto the canvas. Dots, lines, or small puddles all work.
Quick tip: If toddlers are new to squeezing bottles, show them how a gentle squeeze works (not a hard squeeze). Less paint often creates a better “icy” effect.
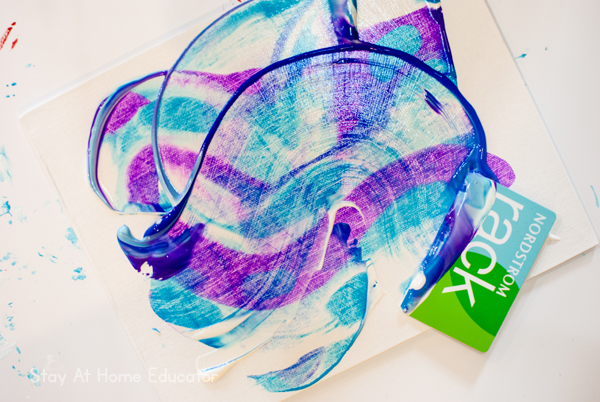
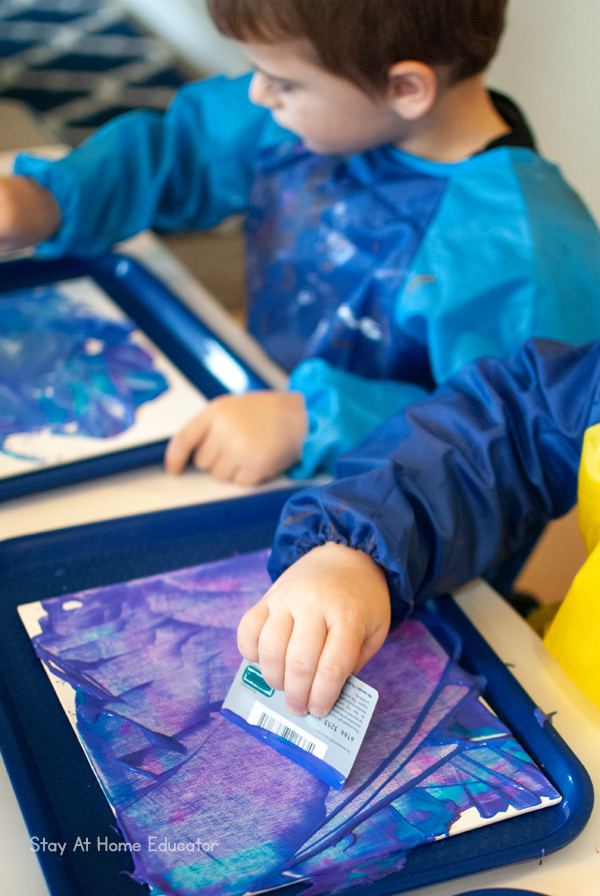
Step 2: Scrape and Spread with the Gift Card
Hand them an empty gift card and encourage them to:
- scrape the paint across the canvas
- pull it up and down or side to side
- swirl it around in circles
There’s no right way—this is where the process art magic happens.
What to expect: The more they scrape, the more colors blend. Some kids love mixing everything, others prefer distinct streaks.
Step 3: Let Them Choose When to Stop
Resist the urge to “fix” it. Let toddlers decide when they’re done.
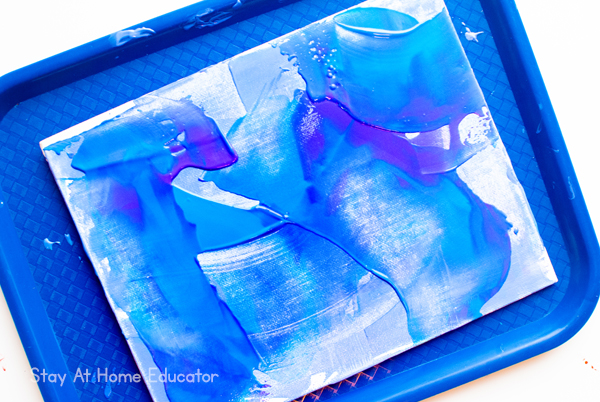
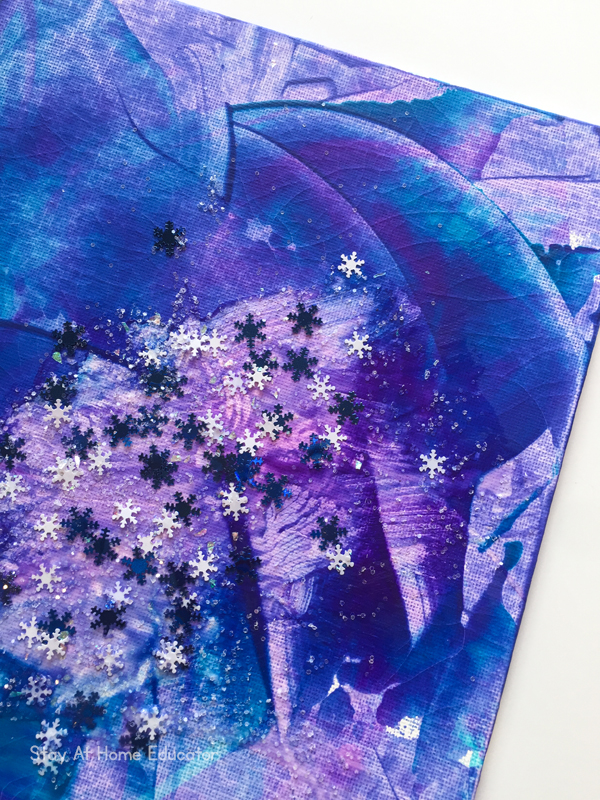
Thick layers of paint might crack a little bit as they dry, but I think that just adds to the winter effect of the art. Think of how many times you have seen cracked ice or thick, crackly frost on the windows. It was an unintended effect of using many layers of paint, but a nice surprise, I think.
If they want to keep going, that’s okay! Just remember that over-mixing can turn colors muddy, which is still totally fine for process art (and a great learning experience).
Step 4: Optional: Add Another Layer (Great for Multi-Day Art)
If you want to extend the activity, let the canvas dry and repeat the process another day with a new color or two. Layering adds depth and makes the final piece extra interesting.
Read this: Glitter-Free Sparkly Winter Process Art!
Step 5: Brush on Glue and Add Sparkle
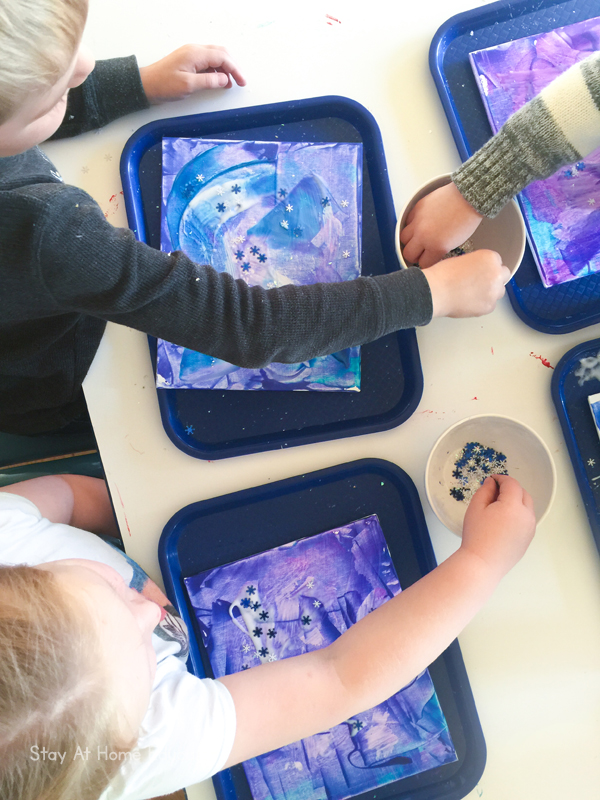
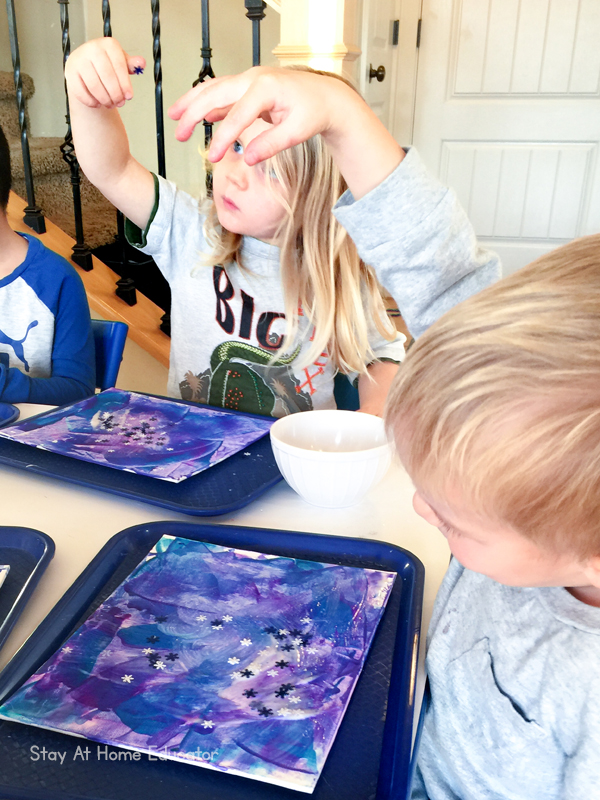
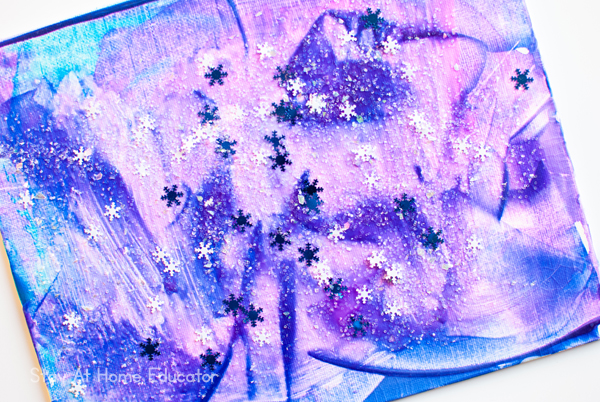
Once the paint is dry, brush a thin layer of glue over the surface. Then invite toddlers to add:
- snowflake confetti (placed carefully or sprinkled)
- a light dusting of iridescent glitter
Note: If you use washable paint, the glue may pick up a little color as you brush. This is normal.
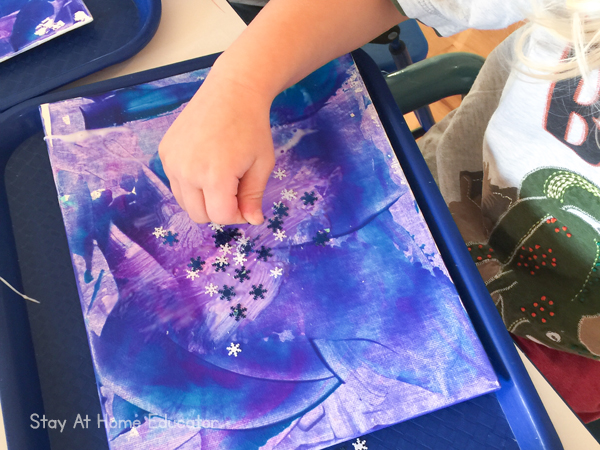
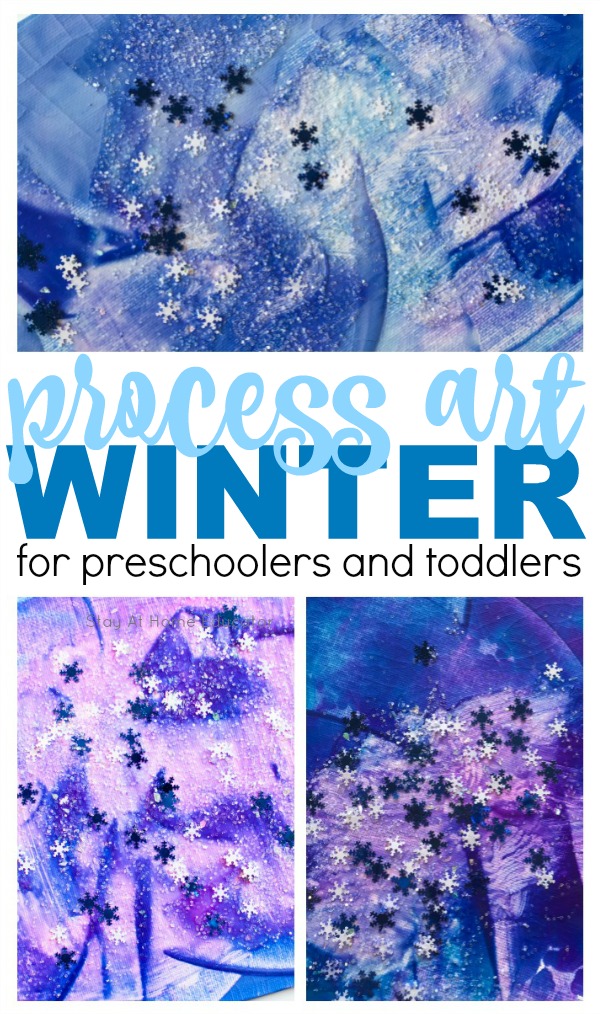
This portion took my toddlers the longest, and also seemed to hold their interest the longest, too. They were all very intentional about the placement of their snowflakes.
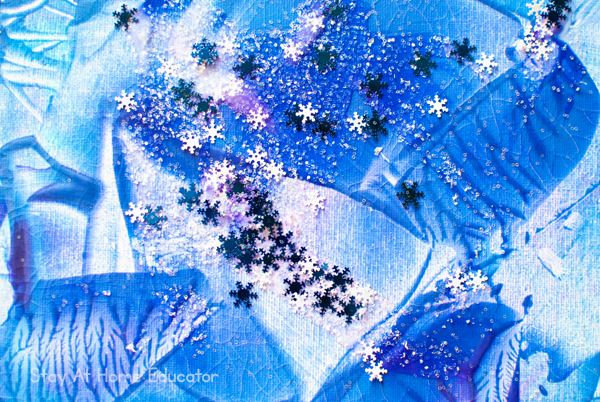
You can really see the layers of paint in these photos. Multiple layers of wintery colors would have been just fine with all the layers they created, but I love how intricate each piece became the more we added and worked.
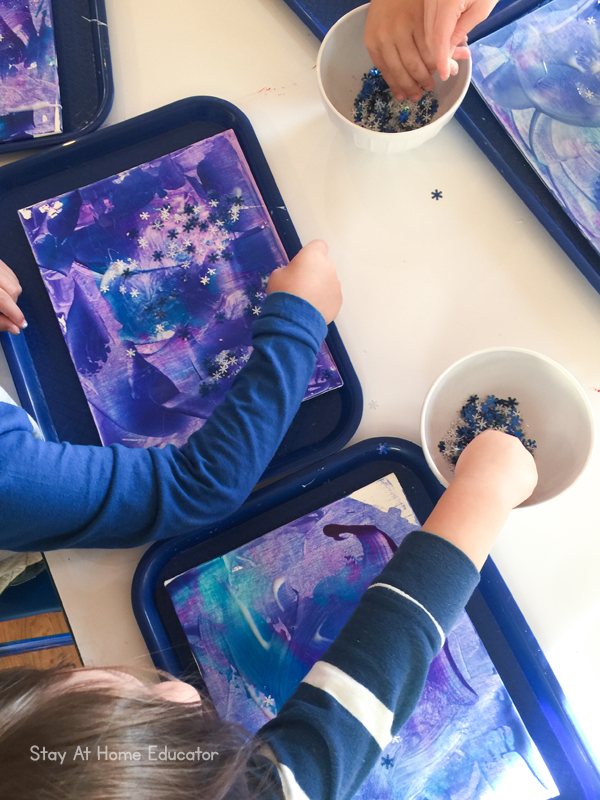
Most of my toddler class ended up dropping them one by one onto their winter paintings, making them fall in random places like real snowflakes.
Step 6: Let It Dry and Enjoy the “Cracked Ice” Look
As it dries, you’ll start to notice extra texture, especially if the paint is thick in places. The layers create a wintery, icy effect toddlers love watching appear.
Toddler vs Preschool Adaptations
It’s super easy to modify this winter process art activity for different ages.
For Toddlers
- Fewer colors
- Thicker paint layers
- Shorter sessions
For Preschoolers
- Multiple paint layers over several days
- Experimenting with pressure and direction
- Adding storytelling or descriptive language
This flexibility makes it perfect for mixed-age winter preschool themes.
Extending This Activity Across Your Winter Preschool Theme
You can repeat this same process art technique throughout winter by changing:
- Color palettes (January blues, December whites, Arctic themes)
- Tools (spatulas, cardboard edges, combs)
- Materials (salt, foil, textured paper)
This allows toddlers to revisit familiar processes while deepening skills—a cornerstone of effective early childhood curriculum design.
In fact, we have a Valentine’s Day heart craft that uses a similar technique.
More Art Ideas for Toddlers
The fun doesn’t stop here. we have loads of art ideas for toddlers.
- Snowball Painting Process Art
- Fall Toddler Process Art Idea: Tissue Painted Art
- Big Scribbling Art for Toddlers
- Science Art for Kids: Oil and Water Droplet Painting
- String Painting for Kids Process Art
- Vibrant Fall Process Art for Toddlers
Common Questions About Winter Process Art for Toddlers
Yes, when set up intentionally, winter process art is very safe for toddlers. Always use washable, non-toxic paint, child-safe glue, and age-appropriate materials. Supervision is important, especially when toddlers are squeezing paint bottles or using small items like confetti.
If you have toddlers who still mouth materials, skip glitter and confetti and focus on paint-only exploration. Smocks, trays, and covered work surfaces also help keep the experience safe and stress-free.
There’s no set time limit—and that’s part of what makes process art so effective. Most toddlers engage for 5–20 minutes, depending on interest, energy level, and developmental stage.
Some toddlers may finish quickly and move on, while others stay focused much longer. Both responses are completely appropriate. The goal isn’t to keep them working—it’s to let them explore for as long as it feels meaningful to them.
No, canvas boards are optional. While they create a sturdy surface and a frame-worthy result, cardboard, foam board, or heavy cardstock work just as well, especially for home or classroom use.
Different surfaces also create different textures, which can actually enhance the sensory experience. Using what you already have is perfectly aligned with the spirit of process art.
This is true process art, not a craft. There’s no template, no example to copy, and no “right” way for it to look. Each child’s artwork will be completely unique because the focus is on exploration, movement, and decision-making, not the final product. Even though the finished pieces may look beautiful, the real learning happens during the process.

Shop our Winter Preschool Centers
Engaging, hands-on activities for early literacy and math skills.


Winter Process Art for Toddlers
Winter process art for toddlers is the perfect way to explore creativity during the colder months. Incorporating these hands-on activities into your winter preschool themes encourages self-expression, sensory exploration, and fine motor skill development.
Materials
- 8x10 canvas boards
- Washable tempera paint
- Empty gift cards
- Liquid glue
- Paintbrushes
- Coarse iridescent glitter (or Epsom salt if you prefer not to use glitter)
- Snowflake confetti
Instructions
- Gather materials: 8x10 canvas boards, washable tempera paint, empty gift cards, liquid glue, paint brushes, coarse glitter (or Epsom salt), and snowflake confetti.
- Set up: Place a canvas board on a tray for each toddler. You can also use foam core or cardboard.
- Add paint: Squeeze a small amount of tempera paint onto the canvas.
- Paint with gift card: Let toddlers use the gift card to scrape the paint around the canvas. Encourage them to experiment with pressure.
- Add layers: Let the paint dry before adding more layers and repeating the process.
- Apply glue: Brush glue on the dried paint. Do this quickly to avoid mixing the paint too much.
- Add snowflakes: Place snowflake confetti onto the glue while it’s still wet.
- Optional glitter: Sprinkle glitter over the wet glue for extra sparkle.
- Let dry: Let the artwork dry completely before displaying.
Recommended Products
As an Amazon Associate and member of other affiliate programs, I earn from qualifying purchases.
-
 Academy Art Supply Canvases Panels 8 x 10 inch - 100% Cotton Artist Blank Canvas Board for Painting, Pre-gessoed, Primed, Acid-Free Blank Canvas, Perfect for Acrylic and Oil Painting, Pack of 12
 -
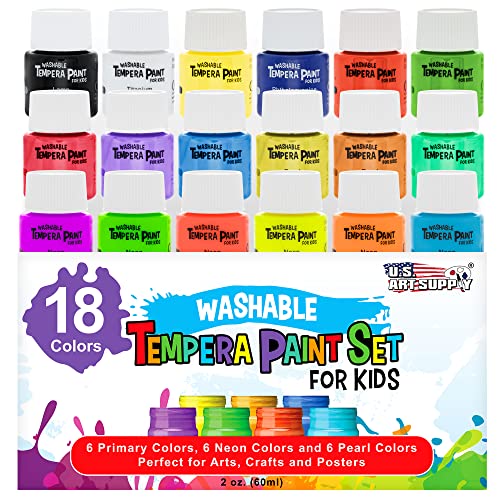 U.S. Art Supply 18 Color Children's Washable Tempera Paint Set - 2 Ounce Wide Mouth Bottles for Arts, Crafts and Posters
 -
 Elmer's Liquid School Glue, Washable, 1 Gallon, 2 Count - Great for Making Slime
 -
 Spectra Arts & Crafts Glitter Assortment, 6 Assorted Colors, 4 oz., 6 Jars
 -
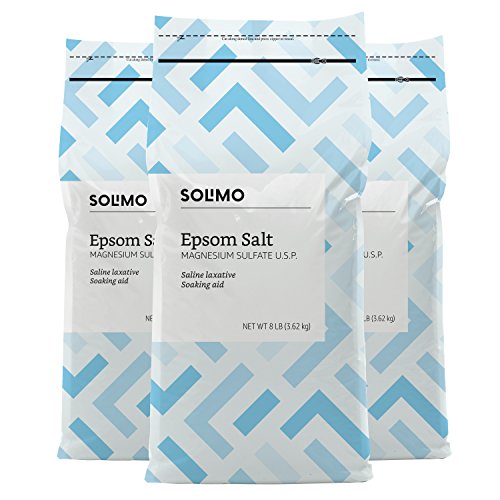 Amazon Brand - Solimo Epsom Salt Soak, Magnesium Sulfate USP, Unscented, 8 pound (Pack of 3)
 -
 OuMuaMua 1200Pcs Snowflakes Confetti Decorations for Christmas, White and Blue Winter Confetti Snow Party Pack for Wedding Birthday Holiday Party Table Decorations Supplies
 -
 Zkptops 6 Pack Kids Art Smocks Waterproof Kids Painting Aprons Toddler Art Smock Kids Paint Smock with Long Sleeve 3 Roomy Pockets for Age 3-7 Years
 -
 New Star Foodservice 24364 Blue Plastic Fast Food Tray, 10 by 14 Inch, Set of 12

I’m Sarah, an educator turned stay-at-home-mama of five! I’m the owner and creator of Stay At Home Educator, a website about intentional teaching and purposeful learning in the early childhood years. I’ve taught a range of levels, from preschool to college and a little bit of everything in between. Right now my focus is teaching my children and running a preschool from my home. Credentials include: Bachelors in Art, Masters in Curriculum and Instruction.
These are gorgeous! I can’t wait to try it!