
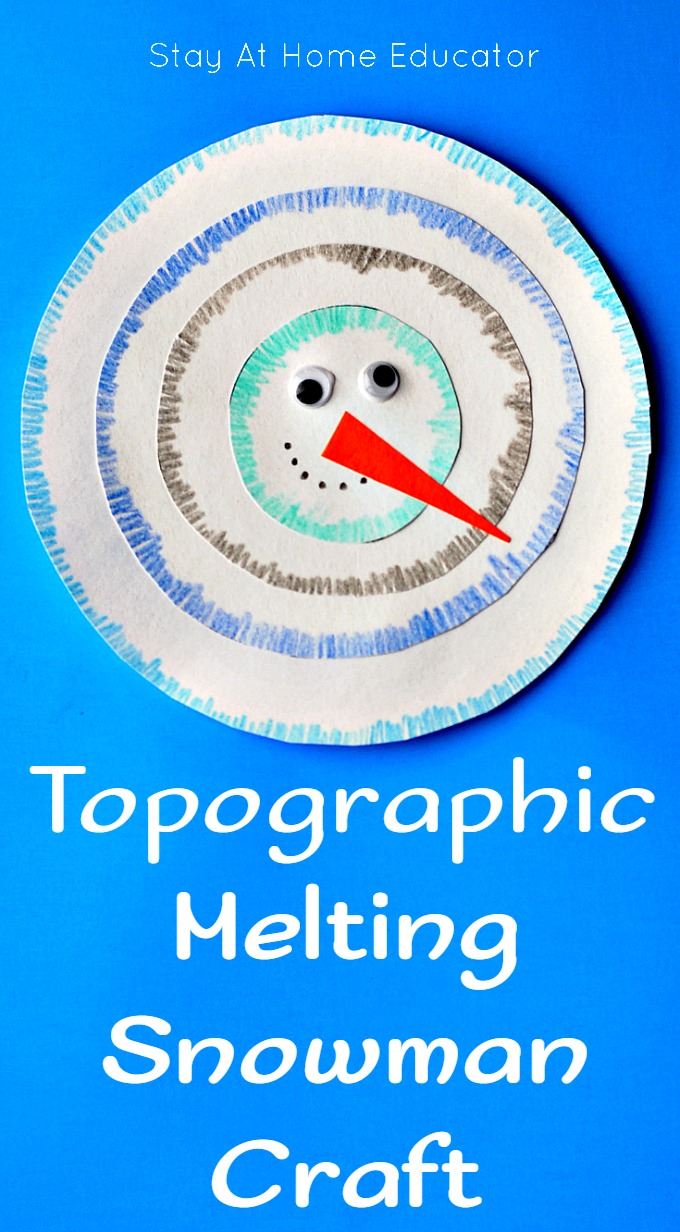
Topographic Melting Snowman Craft
Looking for the perfect melted snowman craft for kids to include in your winter lesson plans? This creative topographic melting snowman activity combines hands-on crafting with early learning, making it one of the best winter preschool activities.
With simple materials and an engaging process, this snowman craft encourages fine motor skills, scissor cutting skills, and a love for art. Get ready to add a unique and fun winter activity to your classroom or home that your preschoolers will love!
This topographic melting snowman craft is not just another snowman project—it’s a fun twist on a classic winter activity.
Designed for preschoolers, this craft introduces the concept of layering and spatial awareness as children create their very own melting snowman. Using simple materials like paper, colored pencils and scissors, kids will stack layers to create a unique, textured snowman.
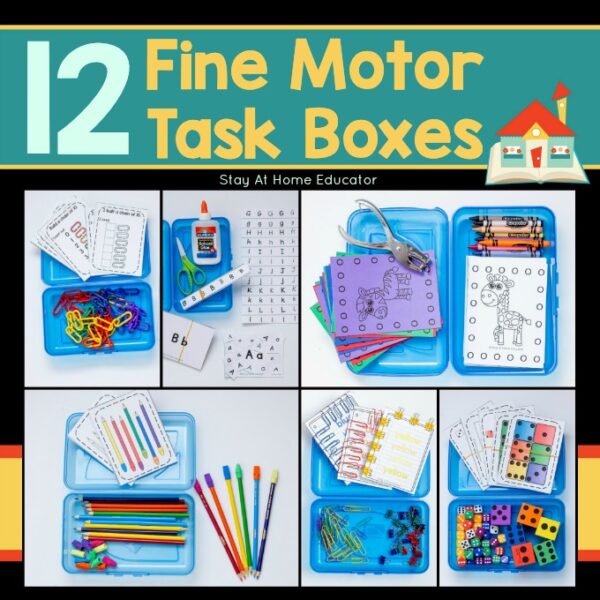
It’s an excellent addition to your lineup of winter crafts and an engaging way to enhance fine motor skills, just like our Christmas fine motor center. We also like to pair it with our snowman counting cards.
-
Winter Preschool Centers
$8.00
Why This Snowman Craft?
It’s hard to choose another snowman craft for preschoolers when this one offers os much incredible skill development. Check out the following reasons why this needs to be on your list of winter crafts.
- Enhances Fine Motor Skills
- Cutting, gluing, and stacking paper layers help develop hand strength, coordination, and precision.
- Pencil Control
- Tracing and decorating the snowman layers helps develop pencil grip and improves control over writing tools, building foundational pre-writing skills.
- Scissor Cutting Skills
- Cutting out the snowman layers and accessories strengthens hand muscles and enhances scissor coordination, preparing preschoolers for more complex tasks.
- Size Sequencing in Mathematics
- Arranging the snowman layers from largest to smallest reinforces size comparison, spatial reasoning, and early math concepts like sequencing and ordering.
- Introduces Spatial Awareness
- Stacking layers teaches children about depth, layering, and how shapes fit together.
Try our weekly Snow and Ice Preschool Lesson Plans.
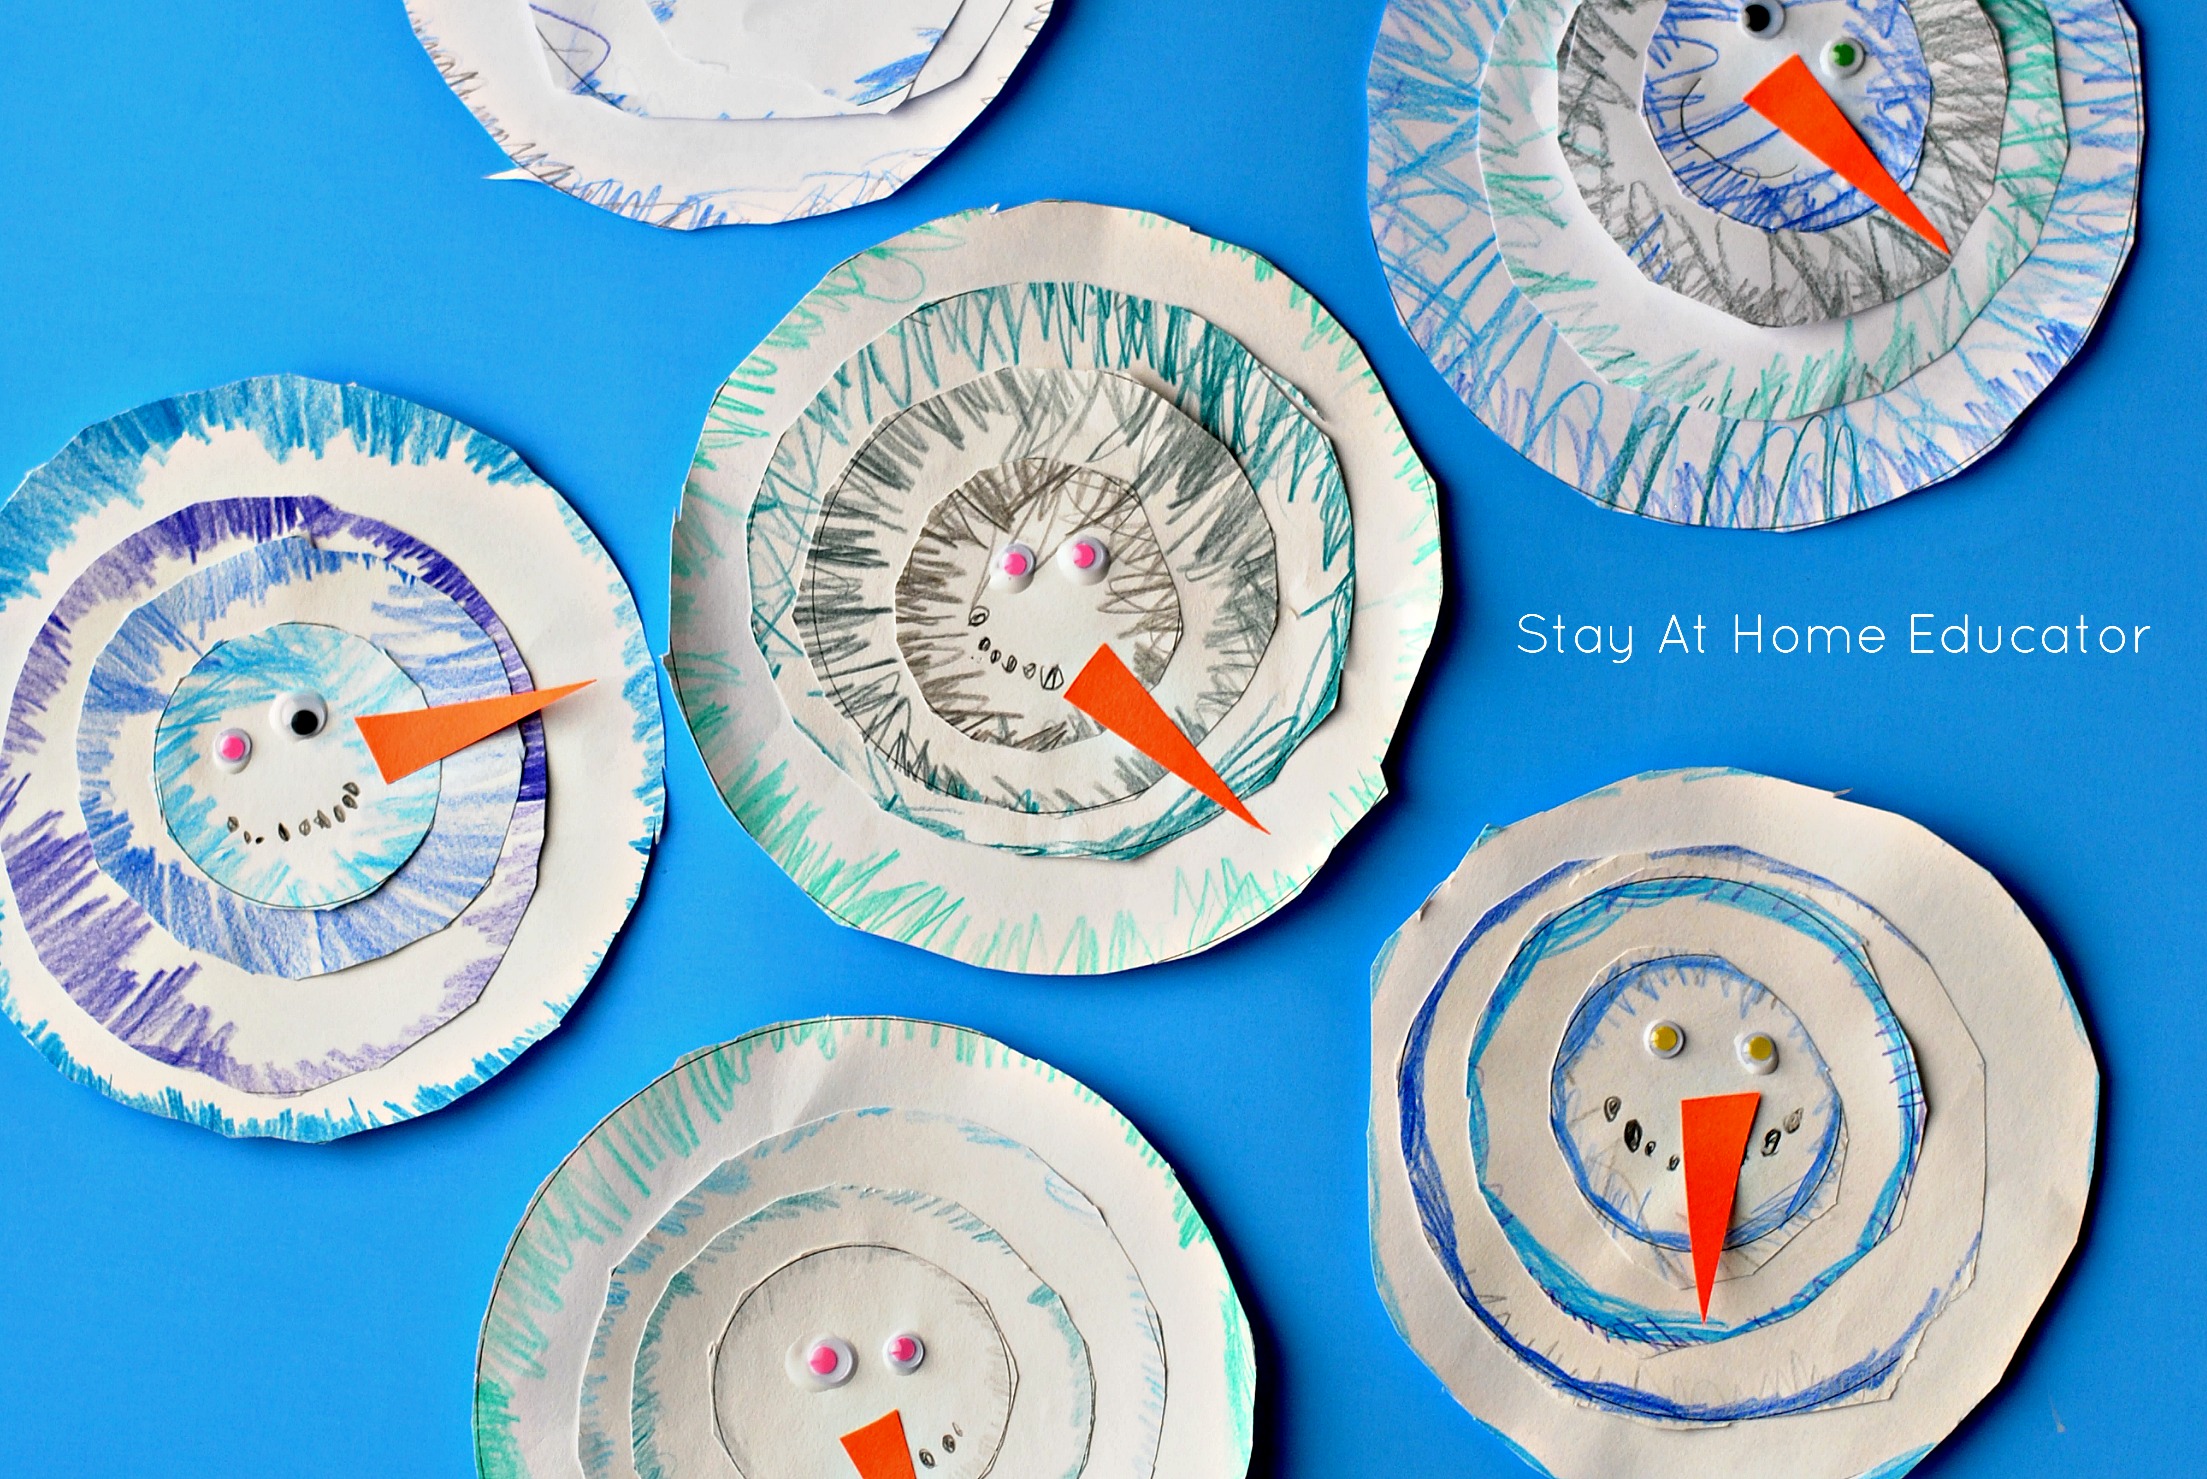
Melted Snowman Craft for Kids
Melted snowman crafts are always so stinkin’ cute, and this one is no different! But what I love the most is all the skill development involved.
I call this a “topographic” snowman because once assembled you can see they layers, which are in relief and remind me of a topographic map.
This post may contain affiliate links, which means that at no cost to you, I may earn a small sum if you click through and make a purchase.
Materials
- two-three sheets of paper with various sizes of circles printed on them
- colored pencils or crayons in hues of blue and gray
- scissors
- liquid glue
- glue stick
- googly eyes
- orange construction paper
Advance Preparation
In advance, create a sheet of circles of various sizes. I did circles in diameters of eight, six, four, and two inches.
How to Make the Melted Snowman Craft
Like all preschool crafts, this one requires steps to be completed in a specific order for best results.
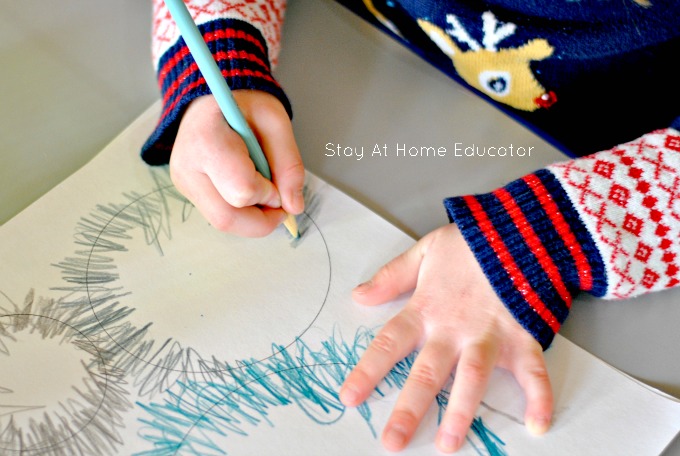
Step 1: Color the Circle Outlines
Invite your preschooler to use colored pencils to trace over the circle outlines. Focus on coloring the outline only, as there’s no need to fill in the entire circle. Encourage your child to use gentle, controlled strokes to stay on the line, which helps build their pencil control and fine motor skills.
Step 2: Cut Out the Circles
Once the outlines are colored, help your preschooler carefully cut out the circles. Provide kid-safe scissors and remind them to follow along the edges of the circles for accuracy. This step is a great way to practice scissor cutting skills while strengthening their hand muscles.
Read this: How Your Preschooler Might be Using Scissors the Wrong Way.
Step 3: Arrange the Circles by Size
Now it’s time to sequence the circles. Typically, when preschoolers are tasked with sequencing size, they show their skills be ordering various sized item in a line. In this craft, preschoolers can use trial and error to order their circles from biggest to smallest. Because the task is to stack the circles in order, it then becomes self-correcting.
Step 4: Glue the Circles Together
Using a glue stick, have your preschooler carefully attach the circles in order from largest to smallest. Encourage them to align the edges of the circles neatly as they stack the pieces to form the snowman’s body. Allow time for the glue to dry before moving on.
This Layered Hearts Valentine’s Craft also teaches size sequencing.
Step 5: Add the Googly Eyes
With liquid glue, invite your preschooler to place two googly eyes on the smallest circle to create the snowman’s face. This step is not only fun but also helps with hand-eye coordination and spatial awareness.
I love it when the googly eyes are placed all wonky and not in a straight line. Or even better, when one gogoly eye is larger than the other.
Step 6: Cut Out the Snowman’s Nose
Using orange construction paper, assist your preschooler in cutting out a small triangle for the snowman’s carrot nose. Encourage them to carefully place and glue the triangle below the googly eyes.
Alternatively, the orange triangles can be cut out by the teacher in advance.
Step 7: Draw the Snowman’s Smile
Using a black colored pencil, guide your preschooler to draw small circles along the bottom of the snowman’s face to represent pieces of coal for a cheerful smile. Let them add any additional details, like eyebrows or rosy cheeks, to personalize their snowman.
FAQ About Making this Snowman Craft
This activity is best suited for preschoolers aged 3–5 but can be adapted for younger or older children with modifications.
Yes! You can pre-cut the snowman layers for younger children to glue together, making it more age-appropriate. And instead of colored pencils, have your toddlers use something chunkier, like oil pastel or Kwik Stix.
The craft typically takes 20–30 minutes, depending on the age and skill level of the children.
Absolutely! It’s perfect for classrooms or playdates and allows children to share ideas and compare their unique snowmen.
Try our Rainbow Snowman Color Sorting Cards, too!
More Snowman Crafts for Preschoolers
If you do an entire snowman theme in preschool, maybe you need more snowman preschool crafts. These are too cute!
- Fluffy Snowman Paper Plate Craft
- Let it Snow! Snowman Craft
- Melted Snowman Collage Craft
- Snow Globe Snowman Craft
- Open-Ended Snowman Craft

Topographic Melting Snowman Craft
Looking for the perfect melted snowman craft for kids to include in your winter lesson plans? This creative topographic melting snowman activity combines hands-on crafting with early learning, making it one of the best winter preschool activities.
Materials
- Two to three sheets of paper with various sizes of circles printed on them
- Colored pencils or crayons in shades of blue and gray
- Scissors
- Liquid glue
- Glue stick
- Googly eyes
- Orange construction paper
Instructions
- Color the circle outlines: Use colored pencils to trace the outlines of the circles on the paper. Focus on the edges to improve fine motor skills.
- Cut out the circles: Cut along the edges of each circle carefully using kid-safe scissors.
- Arrange the circles by size: Order the circles from largest to smallest. This teaches size sequencing and spatial awareness.
- Glue the circles together: Use a glue stick to stack and glue the circles from largest to smallest. Ensure the edges align neatly.
- Add the googly eyes: Use liquid glue to attach two googly eyes to the smallest circle, creating the snowman’s face.
- Cut out the snowman’s nose: Cut a small triangle from orange construction paper and glue it below the googly eyes for the snowman’s nose.
- Draw the snowman’s smile: Use a black colored pencil to draw small coal-like circles along the bottom of the snowman’s face for a smile. Add other details like rosy cheeks or eyebrows if desired.
Recommended Products
As an Amazon Associate and member of other affiliate programs, I earn from qualifying purchases.
-
![Crayola Bulk Colored Pencils for Kids (24pk), Back to School Supplies For Teachers, Teacher Classroom Must Haves, 12 Colors [Amazon Exclusive]](https://m.media-amazon.com/images/I/51slgmd18GL._SL500_.jpg) Crayola Bulk Colored Pencils for Kids (24pk), Back to School Supplies For Teachers, Teacher Classroom Must Haves, 12 Colors [Amazon Exclusive]
Crayola Bulk Colored Pencils for Kids (24pk), Back to School Supplies For Teachers, Teacher Classroom Must Haves, 12 Colors [Amazon Exclusive] -
 Blue Summit Supplies Kids Scissors, 30 Pack, Student Scissors with Comfort Grip, Bulk Safety Scissors for School and Classrooms, Orange, Blue, and Pink Children Scissors
 -
 Upins 1000 Pcs Black Wiggle Googly Eyes with Self-Adhesive, 6mm 8mm 10 mm 12mm Mixed Packaging

I’m Sarah, an educator turned stay-at-home-mama of five! I’m the owner and creator of Stay At Home Educator, a website about intentional teaching and purposeful learning in the early childhood years. I’ve taught a range of levels, from preschool to college and a little bit of everything in between. Right now my focus is teaching my children and running a preschool from my home. Credentials include: Bachelors in Art, Masters in Curriculum and Instruction.
4 Comments