
Fluffy Paper Plate Snowman Craft
If you’re looking for an easy snowman craft for preschool, this paper plate snowman craft is a must-try for your winter theme preschool activities. Kids will love creating their own fluffy snowman while practicing fine motor skills and creativity.
This simple winter craft uses materials you likely already have at home or in the classroom, making it super affordable and really quick to prep! That’s a win in any preschool teacher’s game book.
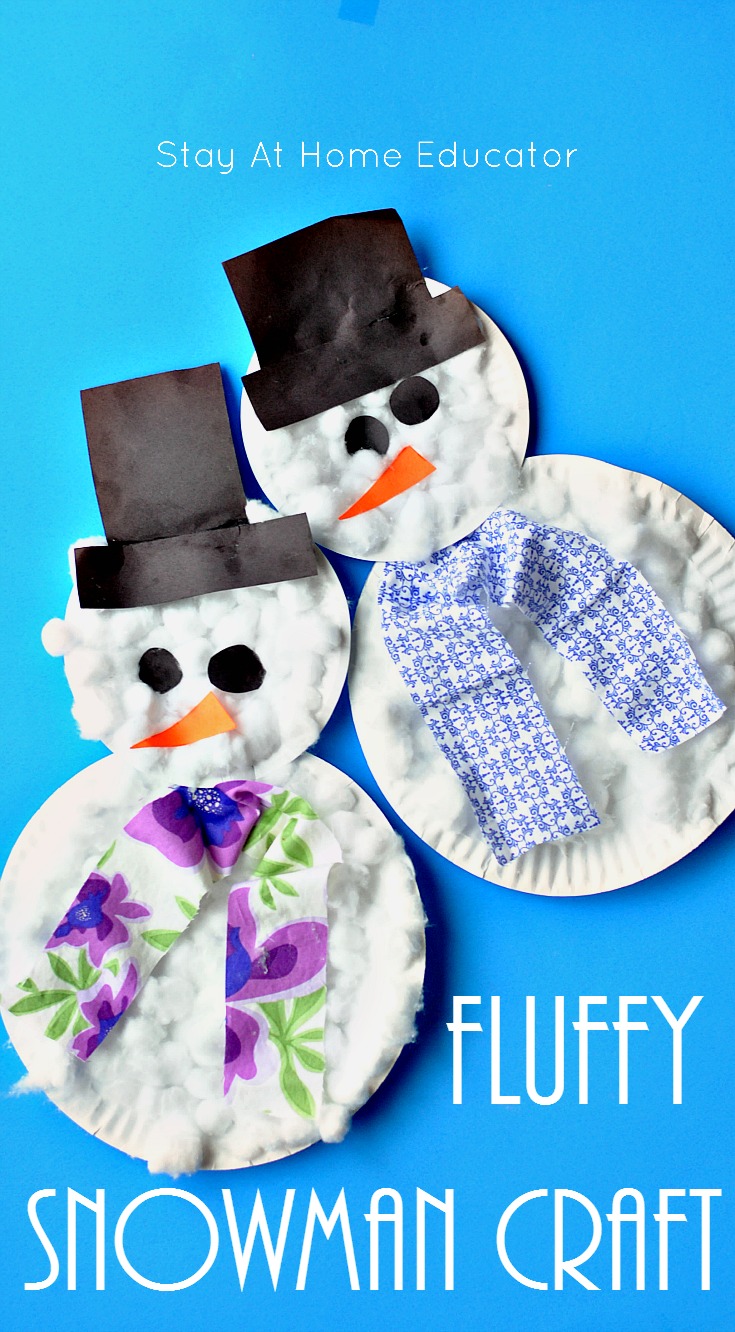
This paper plate snowman craft is perfect for a winter theme preschool activity.
It combines simple materials like paper plates, cotton balls, glue, and construction paper to create a fluffy, textured snowman kids will adore.
Not only is this craft easy to set up, but it also encourages fine motor skill development as preschoolers pinch and place cotton balls, cut shapes, and glue pieces into place.
The result? An adorable snowman that looks as soft as freshly fallen snow. This hands-on activity is ideal for a snowy day inside the classroom or a fun winter project at home.
-
Winter Preschool Centers
$8.00
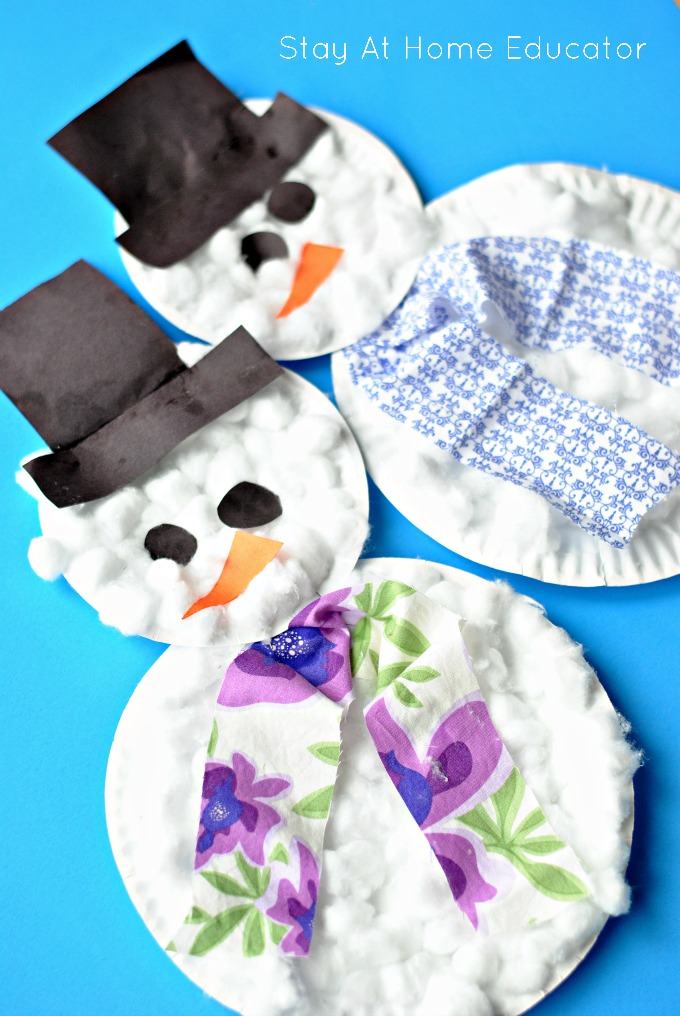
Snowman Preschool Craft
This paper plate snowman craft is a fun and easy winter theme preschool activity that promotes fine motor skills using simple materials like cotton balls and paper plates.
This post may contain affiliate links, which means that at no cost to you, I may earn a small sum if you click through and make a purchase.
Materials
- two white paper plates, one dinner plate size and one dessert size
- bag of cotton balls
- liquid glue
- black construction paper
- orange construction paper
- scraps of fabric
How to Make a Paper Plate Snowman
Like most preschool crafts, there’s a tiny bit of prep work to be completed in advance.
Prepare in advance:
- Use hot glue to glue together the rim of two white paper plates, one dinner plate size and one dessert size. The smaller plate will be the snowman’s head, while the larger dinner plate will be the body.
- Cut long, narrow rectangles from the orange construction paper. This will be the snowman’s nose. Alternatively, your preschoolers can also cut out their own.
- Cut out enough circles for the snowman’s eyes. Ours were about one inch in diameter. Alternatively, you can use black buttons.
- Cut a square, about 4-5 inches in diameter and a long black strip about 1×6 inches. These will be the pieces for making the hat.
- Cut a strip of fabric for each snowman, about 2×18 inches. This will be the snowman’s scarf.
By having the materials precut, your preschoolers will have the flexibklity to assemble their snowman craft as they choose. If your preschoolers have the scissor skills and dexterity, they can do their own cutting if you make them a template.
Then, have your preschoolers follow the instructions below for making their own paper plate snowman craft.
See if your preschoolers are using scissors the wrong way.
Step 1: Stretch out the cotton balls.
Begin by inviting your toddler to gently stretch out the cotton balls. For my younger 2’s, this was a challenge, but it was good fine motor work for their developing muscles.
If the cotton balls get torn into pieces, that it ok. The purpose of the cotton balls is to create texture in the snowman. To make him look lumpy and uneven, like a real snowman.
Step 2: Glue down the cotton balls.
Use liquid glue to glue the cotton balls down onto the paper plates, both the dinner and dessert plates.
Step 3. Make the hat.
Use the black squares and the strip of black construction paper to assemble a hat for the snowman, and glue it down onto the top of the smaller plate. The longer strip will serve as the brim of the hat.
Step 3. Add eyes and a nose.
On the smaller plate, glue down two circles or buttons for the eyes, and add an orange triangle for the carrot nose.
If using black buttons, you may want to make them extra secure by using hot glue instead of liquid glue. This should only be done by an adult!
Step 4: Add a scarf.
Use a strip of fabric and glue it to the base of the smaller paper plate t make a scarf for the snowman. Some preschoolers may want to make a bow, or they may try to crumple it up, and either way is ok.
Step 5: Optional, but helpful.
Due to the weight of the glue and the cotton balls, staple the two paper plate together to form the head and the body of the snowman after the crafts have dried over night.
Try this Sparkling Snow Playdough Recipe!
More Snowman Crafts for Preschool
- Topographic Melting Snowman Craft
- Melting Snowman Craft with Paint Blowing
- Snowman Waffle Printing
- Snowman Suncatcher

I’m Sarah, an educator turned stay-at-home-mama of five! I’m the owner and creator of Stay At Home Educator, a website about intentional teaching and purposeful learning in the early childhood years. I’ve taught a range of levels, from preschool to college and a little bit of everything in between. Right now my focus is teaching my children and running a preschool from my home. Credentials include: Bachelors in Art, Masters in Curriculum and Instruction.
We made these into little friends to keep in the classroom.
“These Arctic and winter activities are so fun and creative for kids! For more ideas and helpful resources