
Name Art for Preschoolers to Teach Letter Recognition
Preschoolers love seeing their names—especially when they can make them! Name art for preschoolers and letter recognition activities go hand in hand when you turn learning into a hands-on, colorful experience.
This tape resist name idea isn’t just about art—it’s about helping little learners get excited about the letters in their names. Each step is a chance to practice name, letter, and sound recognition. When kids start connecting letters to sounds, especially in something as special as their name, it really sticks.
You know that magical moment when a preschooler spots their name on a cubby or their artwork—and their whole face lights up? That’s the kind of excitement we can build on in the classroom with fun, hands-on name activities. One of my favorites is using tape resist art to create colorful name booklets. It’s bright, engaging, and gives kids ownership over their learning. And, it’s a fun way to learn letter recognition, too.
Kids not only get to spell out their name in bold colors, but they also explore the sounds each letter makes and how it relates to their name. It’s all about making those early phonics connections stick—and when it’s wrapped up in an art project that feels more like play than work, it’s a win for everyone.
When learning is meaningful and fun, kids are more likely to remember it—and that’s what we all want, right?
Read this: How to Teach Letter Sounds Effectively
Skills Developed Through This Activity
This kids activity serves two primary purposes:
- to teach a preschooler how to spell his name, and
- to teach letter-sound association within the name
Those are the primary goals, at least, but a secondary goal also includes developing creativity, fine motor skills, print awareness and emergent writing skills.
Exploring the Tape Resist Name Art and Phonics Booklet Activity
This activity offers a hands-on approach to learning names, letters and sounds through art. Children create personalized booklets that make learning both fun and meaningful.
Materials
- Kwik Stix
- black drawing booklet (or stapled black construction paper)
- contact paper
- scissors
The Set-Up
I actually purchased a set of six 16-page booklets from Target’s dollar spot. They have black covers and black paper inside, which was perfect for this activity because the Kwik Stix we used showed up beautifully on the black background.
But if you want to create you own, the steps are included:
Make the booklet
Cut down several sheets of black construction paper and staple them together to form a booklet. The booklet should have twice as many front-to-back pages as there are letters in your preschooler’s name.
Choose your paper color
Black paper is ideal for creating a striking resist art effect, but you can use other colors if needed.
Prepare the name letters
If your child isn’t ready to cut yet, draw large block letters of their name on the paper side of contact paper.
Cut and place the letters
Cut out each letter and use them like stickers. Place one letter on every even-numbered page of the booklet—this will be the left side of each open spread, leaving the right side blank for artwork.
Alternatively You Can Use…
It was a little time consuming cutting out each individual letter in each student’s name. So, alternatively, you can also use any of the following:
- jumbo letter stickers
- masking tape
- removable vinyl and a cutting machine
Read this: What is Letter Recognition for Preschoolers?
Teaching Letter Recognition with the Name Booklet
This activity seamlessly blends art with literacy, making learning both visual and tactile.
Step 1: Let’s Talk About Our Names
Start by chatting with the children about their names and why each letter is important. You can show them an example of tape resist art to get them excited. Explain that they’ll be making their very own name book—each page will show off a different letter from their name. Make it fun and meaningful!
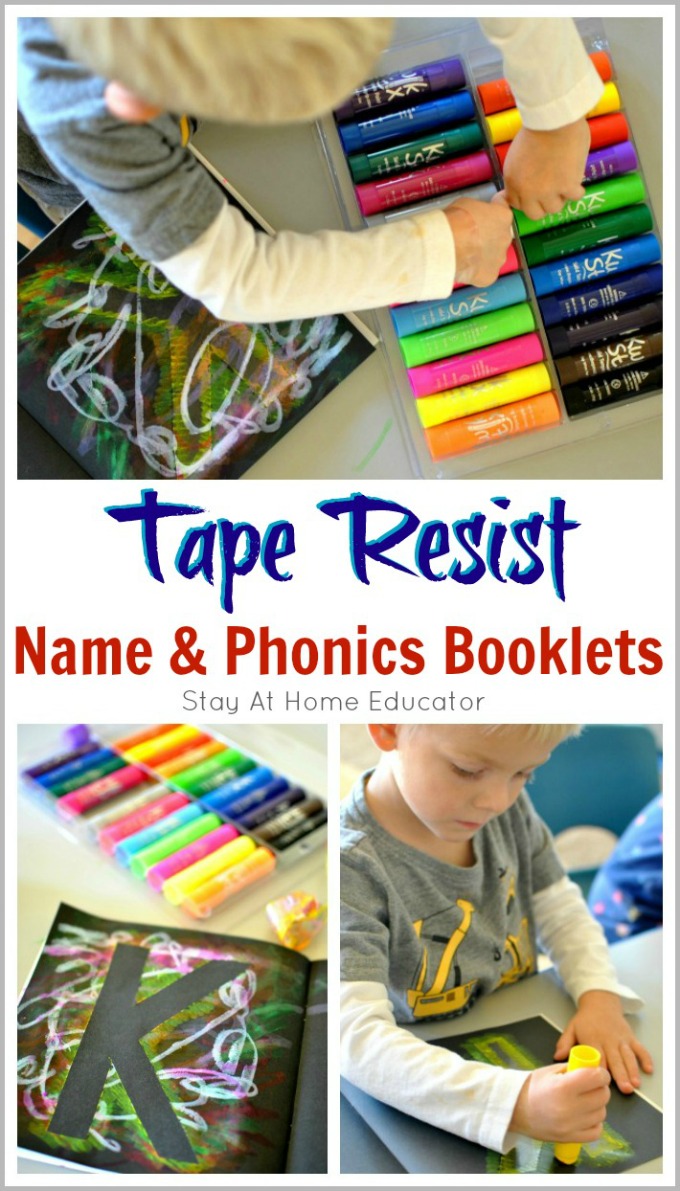
Step 2: Sticking on the Letters
Help the children stick their contact paper letters onto the pages of their booklets, if you didn’t do this step in advance. (I did). Make sure the letters are pressed down well. As you work, talk about each letter—what it looks like and the sound it makes.
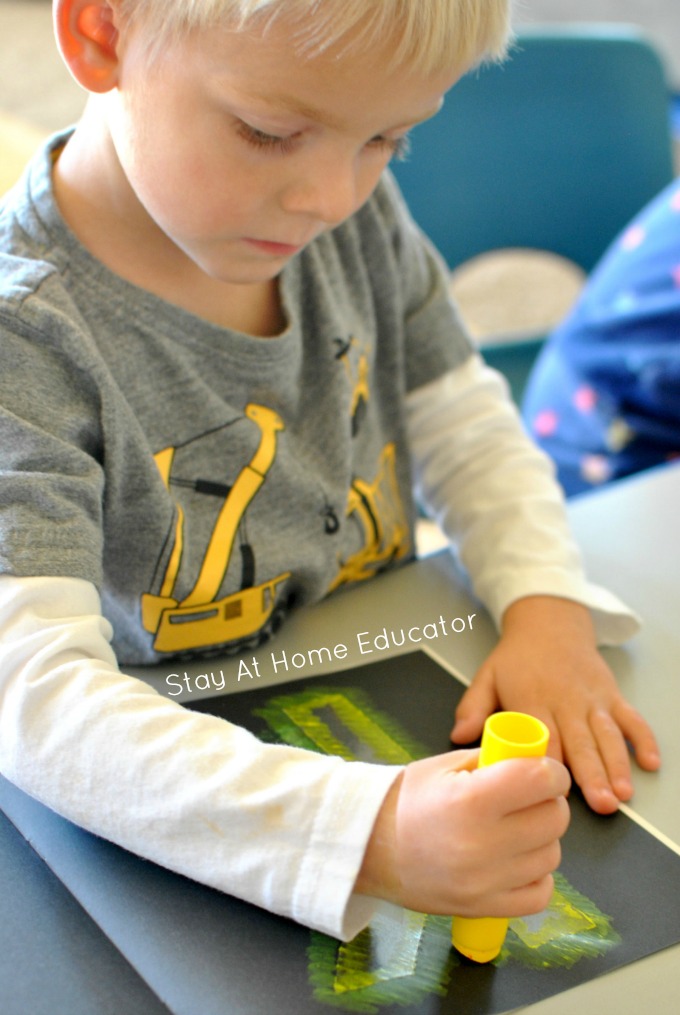
Step 3: Time to Paint!
Give the kids some Kwik Stix or other solid paint to color over their pages. Encourage them to fill the whole page with bright, bold colors – These will really stand out against the black paper. The paint dries quickly, so it won’t be long before they’re ready for the next step.
Not familiar with Kwik Sticks?
Kwik Stix are solid tempera paints. They glide on paper like a high-quality oil pastel, but even though they are solid tempera paints they dry in less than two minutes. This allows the colors to be blended some, like paint, but certainly without the mess and clean up of traditional tempera paints.
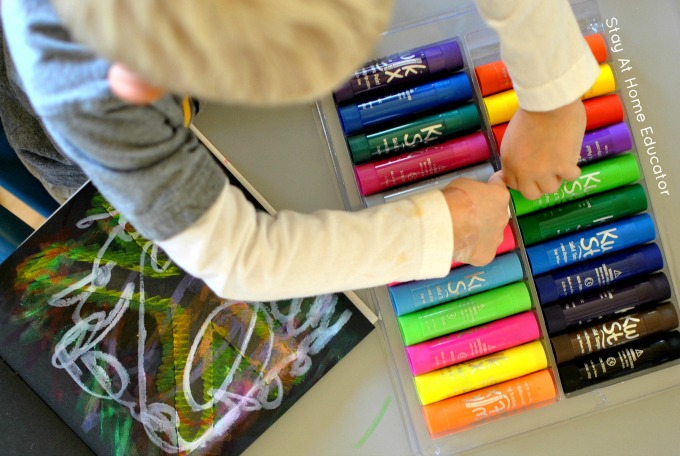
Step 4: The Big Reveal
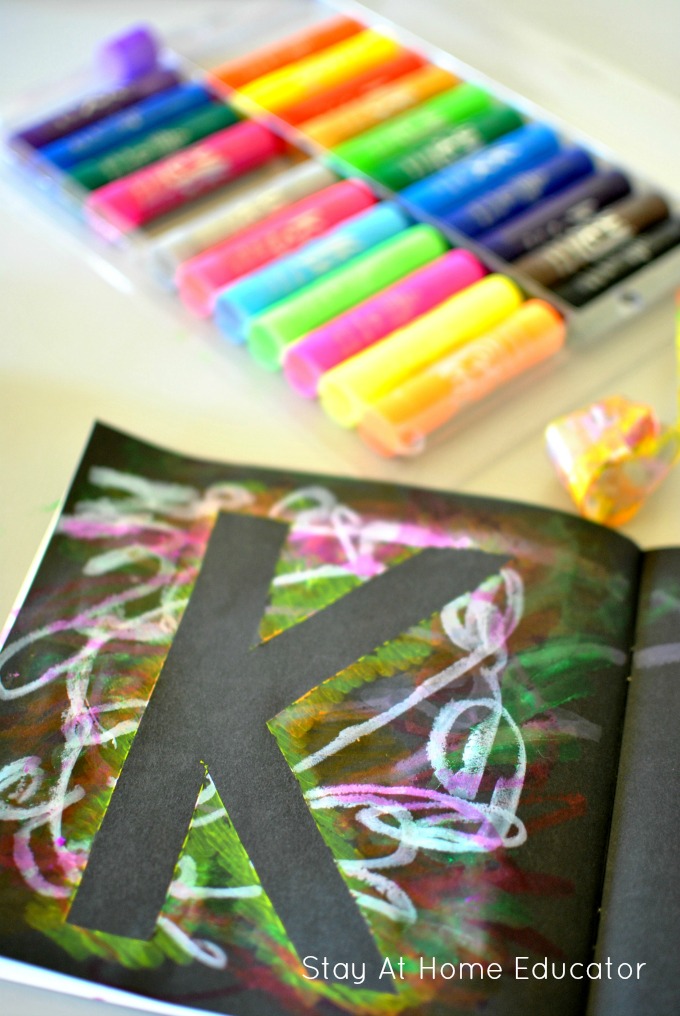
Once the pages are dry, help the children peel off the contact paper letters. Watch their faces light up as the clean letter shape appears! Seriously! They get super excited to reveal the letters.
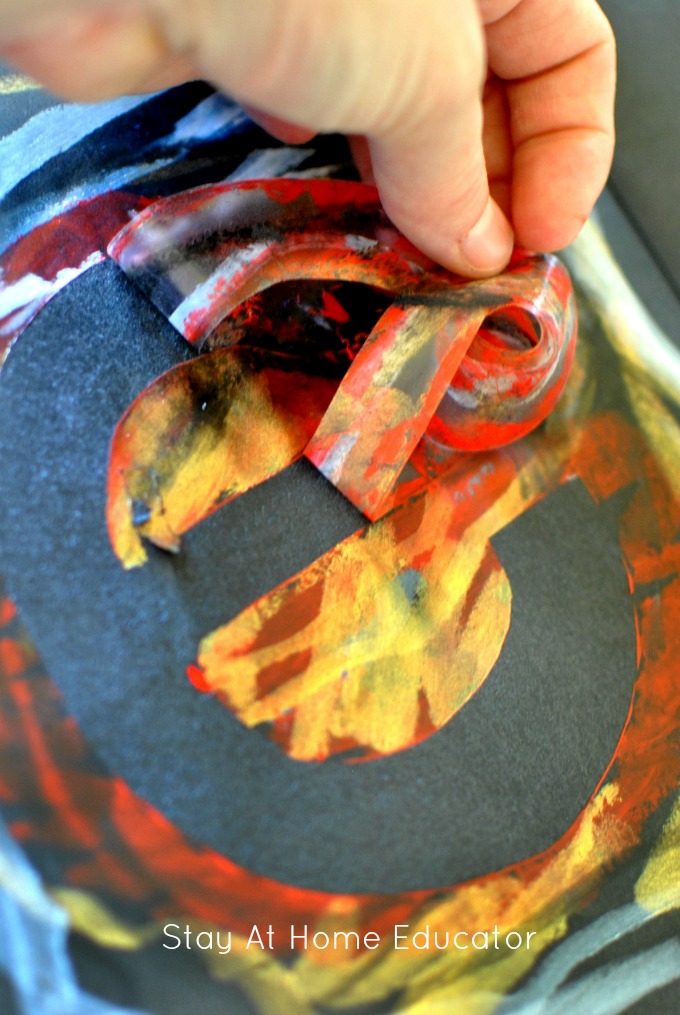
The benefit of using contact paper for this, rather than painter’s tape, is that the contact paper isn’t quite as sticky, so it won’t tear the paper. And when the contact paper is pulled off, you end up with a letter like this:
Name and Letter Recognition Activity
While your child might already recognize the first letter in their name, you may still be working on connecting each letter with its sound. After you finish the tape resist name activity, go back through the booklet together and think of a word that begins with each letter in your child’s name.
For example, for the letter K, your child might draw a kite. For the letter E, maybe an elephant. Let your child do the drawing, and then you can label each picture for them. This adds another layer of learning and helps reinforce both letter recognition and sounds in a fun, personal way.

Don’t you love how vivid the colors of the Kwik Stix turn out on the black paper!
Shop our Letter Formation Printables
Fun, engaging practice mats that promote proper letter formation.
Hands-on Letter Recognition Activities
Need more letter recognition activities? Try some of these!
- Hands-on Alphabet Worksheets
- 12 Hands-on Alphabet Activities for Preschoolers
- Alphabet Pattern Blocks Printable
- ABC Hide and Seek
- Dirt Play Dough + Rock Writing Tray
- Bubble Wrap Letter Play
Read this: How to Teach Letter Recognition: The Secret to Early Literacy

I’m Sarah, an educator turned stay-at-home-mama of five! I’m the owner and creator of Stay At Home Educator, a website about intentional teaching and purposeful learning in the early childhood years. I’ve taught a range of levels, from preschool to college and a little bit of everything in between. Right now my focus is teaching my children and running a preschool from my home. Credentials include: Bachelors in Art, Masters in Curriculum and Instruction.
I loved your name book idea. I had not ever heard of the kwik stiks. Thank you so much for the very good ideas.