
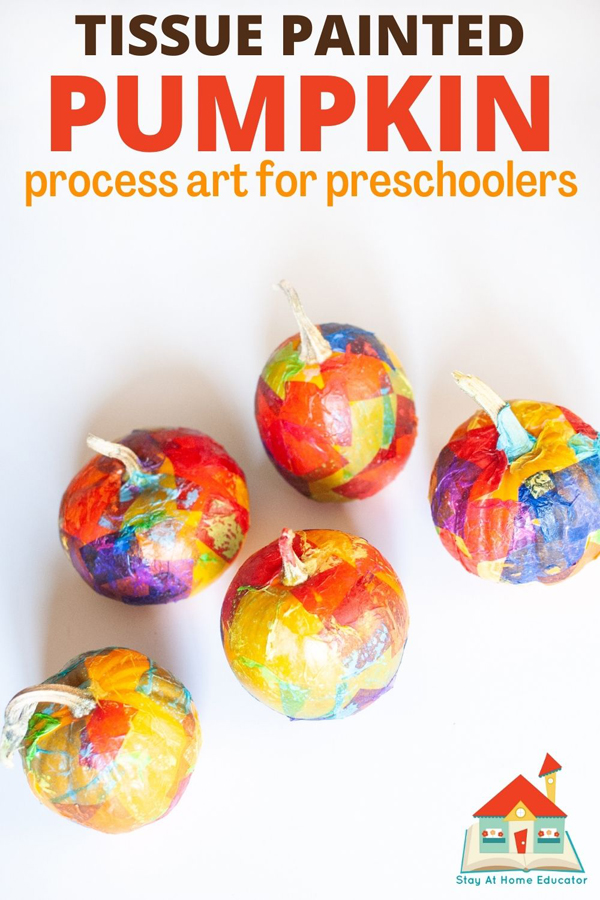
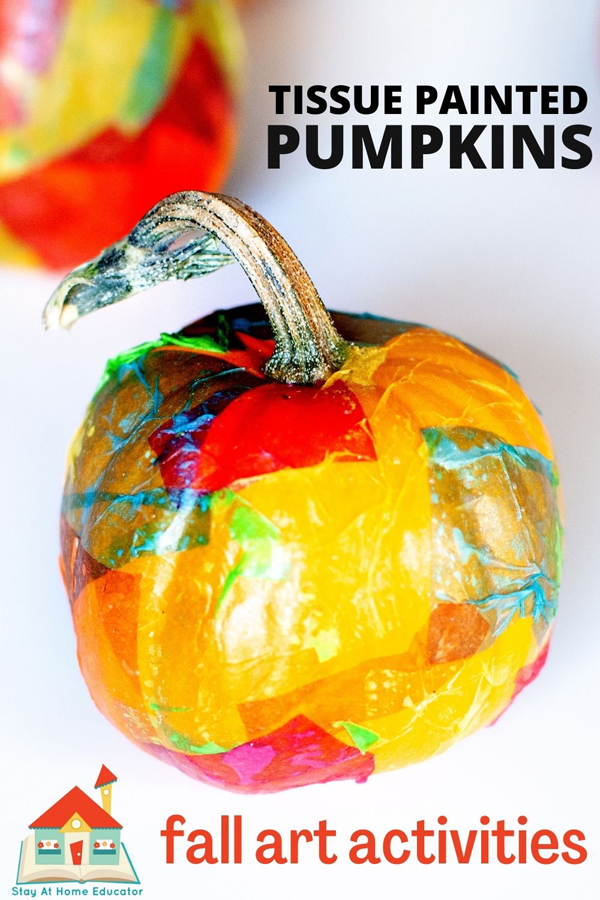
Pumpkin Art Activity: Tissue Painted Mini Pumpkins
Preschoolers love painting. They love gluing. They also love decorating pumpkins! I combined all three of these favorite things into one activity for the perfect pumpkin art activity – tissue painted mini pumpkins! it’s juts one of many process art activities we include in our fall preschool themes.
Try adding this pumpkin process art to in any autumn, Halloween, or farm theme in preschool. The students were so happy to make painted tissue paper mini pumpkins during our harvest party.
Any great set of preschool lesson plans is going to include some sort of process art or a thematic craft project. It’s not different for a fall preschool theme, pumpkin preschool theme, or even a Halloween preschool theme.
These tissue painted mini pumpkins make the perfect pumpkin art activity to add to your seasonal and holiday activities in preschool.
Decorating Mini Pumpkins
Like carving pumpkins into jack-o-lanterns, decorating mini pumpkins at preschool is a Halloween tradition in most classrooms. Halloween crafts don’t have to be elaborate. This fun pumpkin activity is a great craft for toddlers too!
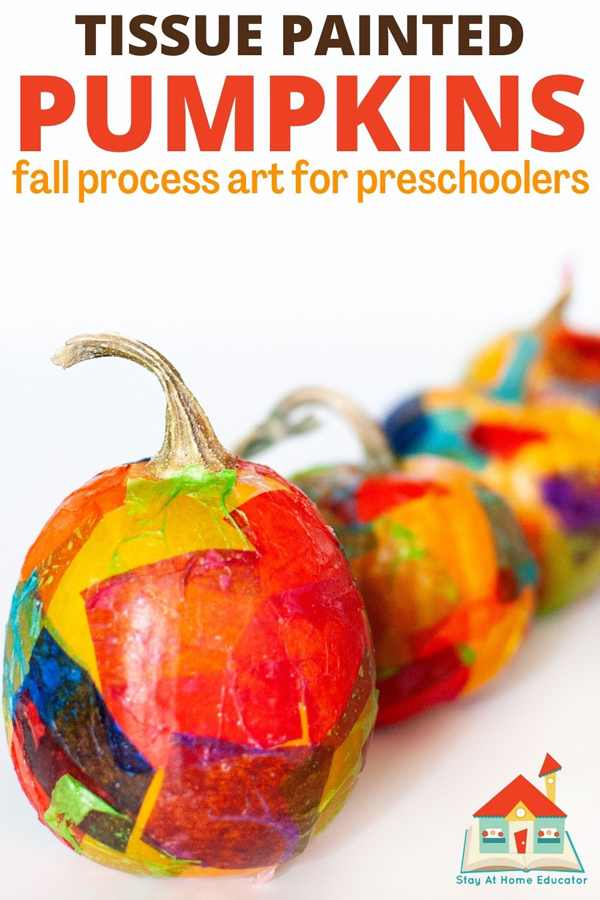
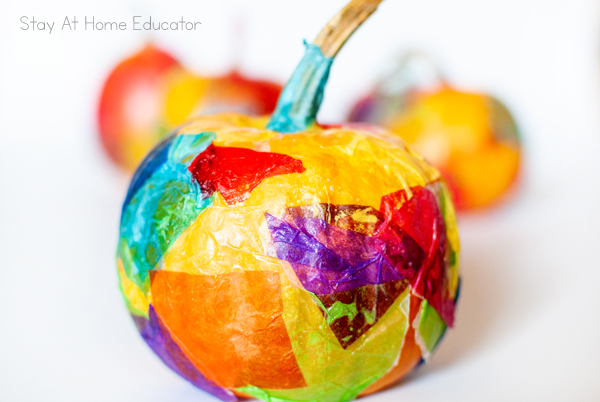
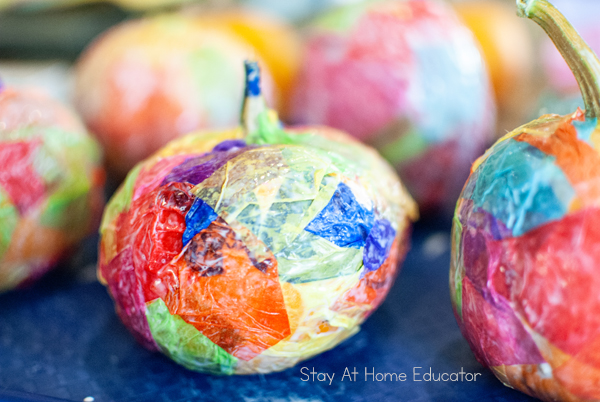
These painted preschool pumpkins are actually painted with liquid white glue. Then my preschoolers delicately covered the glue with tissue paper. Once tried, the pumpkins look like stained glass!
Tissue paper is a favorite art supply in my classroom. We use them in these fall paper plate wreaths, and even in this fall process art for toddlers!
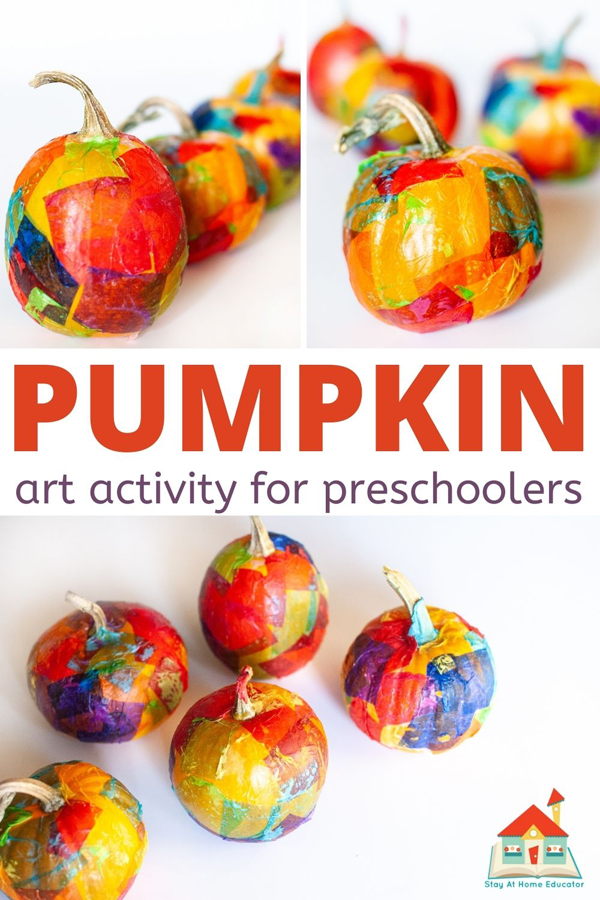
Mini Pumpkin Painting
You can really use any kind of pumpkin. Carving pumpkins will be big for a preschooler to tissue paint completely, so I like to use mini pumpkins. Plus, mini pumpkins are cheap, comparatively.
I would not recommend using plastic pumpkins. The liquid school glue will peal away from the plastic once it dries. To use plastic pumpkins, you would need to use a specialty glue that will adhere to plastic.
That’s why we stick to this mini pumpkin decorating idea. It’s just too easy!
We like to allow the pumpkins to dry and then use them as decoration around our classroom before sending them home.
FAQ About Tissue Painted Mini Pumpkins
This tissue-painted mini pumpkin activity is perfect for preschoolers, but older children can enjoy it as well. It’s a simple craft that can be adapted for a range of ages.
This activity helps preschoolers develop fine motor skills, creativity, and color recognition. It also provides a sensory experience as they handle the tissue paper and apply it to the pumpkin.
This is a must add to our pumpkin activities for preschoolers and we always include them in our pumpkin preschool lesson plans!
Sort of. Plastic pumpkins will not result in a good outcome, however styrofoam mini pumpkins work just as well for this activity and can be reused for seasonal decorations in the future.
Tissue Paper Pumpkin Craft
If you’re not already hooked on this pumpkin activity, let me take you through the steps. These pumpkins turn out so pretty and they can be made by both preschoolers and toddlers!
Materials
- mini pumpkins
- liquid glue
- paint brushes
- paper plates
- tissue paper in small squares (no bigger than 2 inch squares)
How to Decorate Mini Pumpkins
Now we are getting to the fun part – painting pumpkins with preschoolers! These turned out so pretty, and my preschoolers loved every bit of the process, too!
Cut the Tissue Paper to Size
To prepare, cut the tissue paper into small squares. If you’re using mini pumpkins, the squares should be between one and two inches (but the measurements don’t need to be exact).
If you’re doing a larger pumpkin, then cut larger tissue squares. (You can save even more time by using these precut tissue paper squares.)
Place the tissue squares on a paper plate and make sure each preschooler can easily reach the plate.
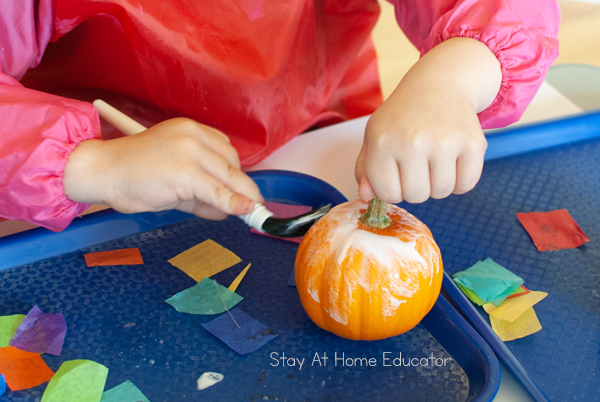
Pour some liquid glue onto a paper plate or in a shallow bowl. Give each preschooler a paintbrush and a mini pumpkin and invite them to join you in a pumpkin art activity!
Paint the Pumpkins with Glue
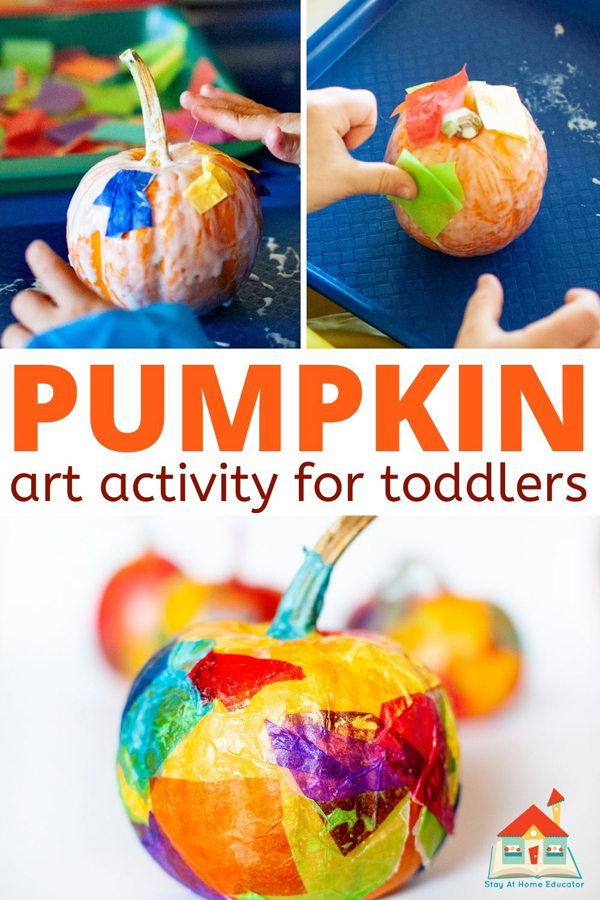
Start by painting a layer of glue all over the pumpkin. You want the layer to be fairly thick, but not dripping.
And don’t worry about using a paintbrush to do this. If you use liquid school glue (which is a pva glue), it easily washes out of the brushes.
See the fine motor work that went into brushing the pumpkins with glue; it takes a steady hand and attention to detail!
Cover with Tissue Paper
Once the pumpkins are covered in a nice layer of glue, start adding the pieces of tissue paper.
Now, here is an important detail. Your preschooler’s fingers are going to touch the glue on their pumpkins and then the tissue paper is going to stick to their fingers.
And this is going to be awkward and frustrating to some preschoolers. That’s ok. I just tell my preschoolers that they can wash their hands when they are all done with their pumpkins.
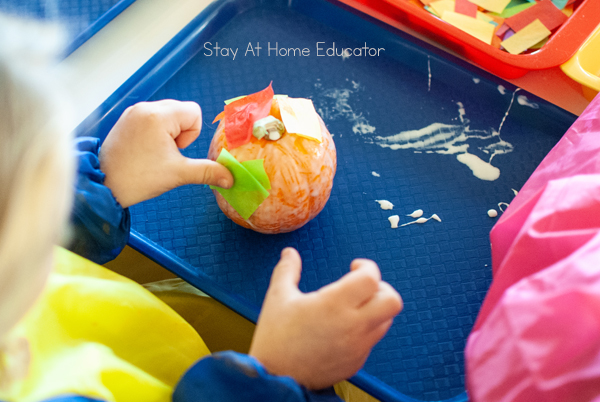
As a result, the preschoolers may not completely press down the tissue paper. The pumpkins might end up looking like this:
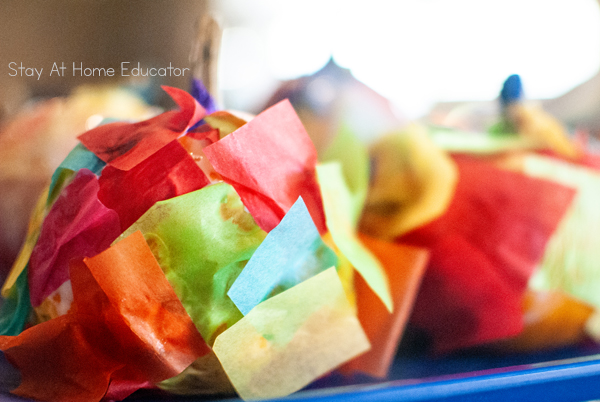
Paint the Mini Pumpkins Again
If the pumpkins end up looking like the above photo, just go back and use some liquid glue and paint over the tissue paper. This is a necessary step anyway.
Allow to Dry Completely
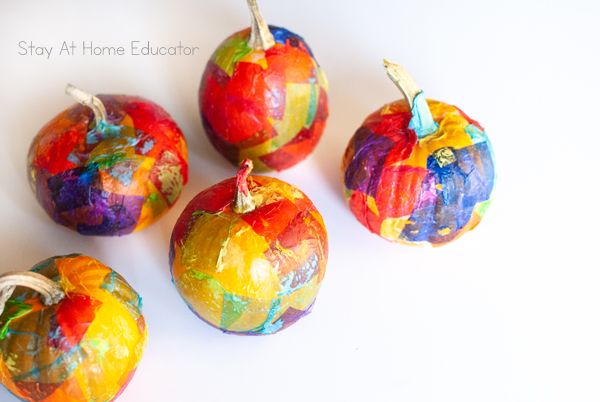
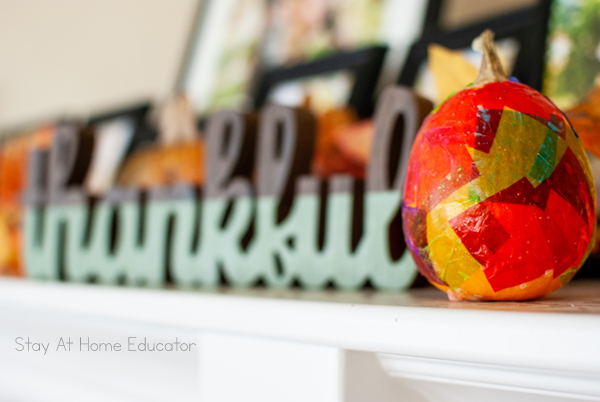
Allow the pumpkins to dry completely. It will take at least 12 hours, sometimes even overnight or an entire 24 hours. When they are dry, they will look like this:
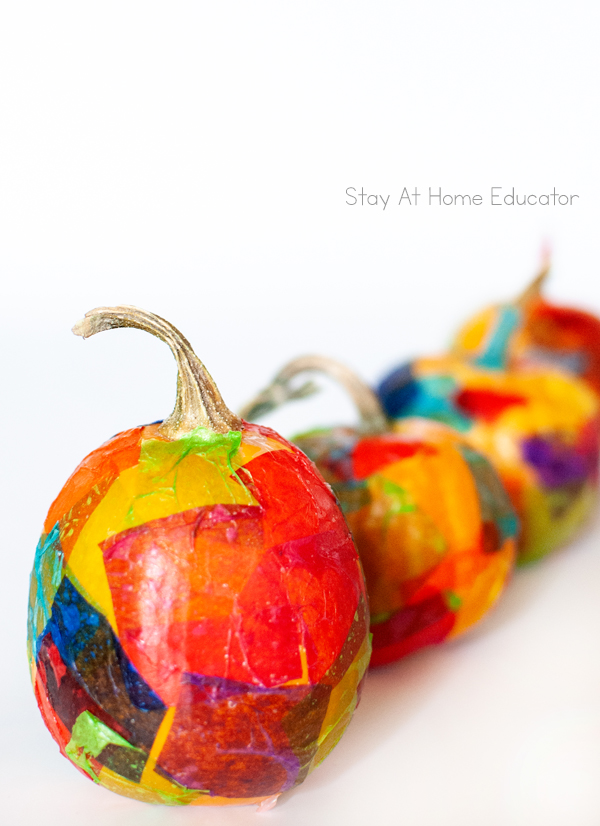
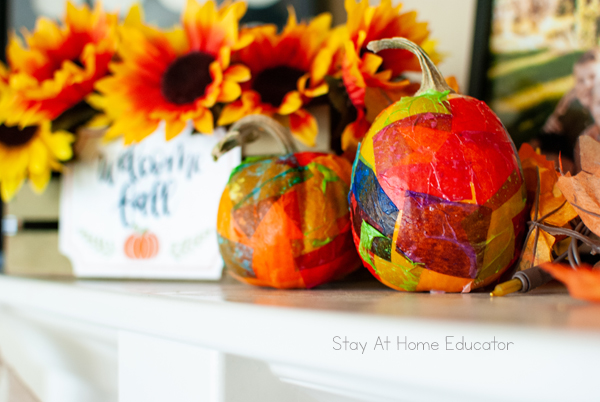
I think these pumpkins turned out gorgeous! My preschoolers are always so surprised at the finished result and are so proud when they are displayed. They look lovely on the fireplace mantel along with other fall decorations.
Painted Pumpkin Ideas for Preschoolers
While it’s hard for me to image more beautiful pumpkins than these, here are some more pumpkin art projects to use with preschoolers:
- Splatter Painted Pumpkins
- Glitter Painted Pumpkin
- Rainbow Painted Pumpkins
- Squeeze Drip Painted Pumpkins
- Sticker Pumpkins
Pumpkin Books for Preschoolers
Just about any preschool activity can be elevated when you add some well-written picture books to the activity. These are some of our favorite picture books about pumpkins:


Tissue Painted Mini Pumpkins
Just in time to add to your favorite fall preschool themes, your preschoolers will LOVE creating tissue painted mini pumpkins. This activity offers excellent practice in developing fine motor skills, creativity, and prolonged focus. Your preschoolers will be beaming, as it becomes a beautiful part of your fall decor, which makes it the perfect pumpkin art activity!
Materials
- mini pumpkins (REAL pumpkins, not artificial)
- liquid glue
- paint brushes
- paper plates
- tissue paper in small squares (no bigger than 2 inch squares)
- plastic craft trays
Instructions
- To prepare, cut the tissue paper into small squares (approximately 1-2 inch squares) or if you buy pre-cut tissue squares, you can skip the cutting.
- Place the tissue squares on a paper plate (or a few plates if you prefer) within reach of all of the preschoolers.
- Pour some liquid glue onto a paper plate or in a shallow bowl (again, you may prefer to have a few plates/bowls) within reach of all the kiddos.
- Give each preschooler a paintbrush and a mini pumpkin and invite them to join you in a pumpkin art activity.
- Start by painting a layer of glue all over the pumpkin. You want the layer to be fairly thick, but not dripping.
- Once the pumpkins are covered in a nice layer of glue, add the pieces of tissue all over the pumpkin. They will typically overlap one another a bit.
- Once it is covered in tissue paper, use some liquid glue and casually paint over the tissue paper (especially over any papers that are sticking up).
- Allow the pumpkins to dry completely. It will take at least 12 hours, sometimes even overnight or an entire 24 hours. Your preschoolers will be in awe of the finished products- they almost have a "stained-glass" effect.
Notes
Your preschoolers' fingers are going to touch the glue on their pumpkins and then the tissue paper will stick to their fingers. This might feel awkward and frustrating to some preschoolers. That's ok. Just keep encouraging them and let them know they can wash their hands when they are done.
Recommended Products
As an Amazon Associate and member of other affiliate programs, I earn from qualifying purchases.


I’m Sarah, an educator turned stay-at-home-mama of five! I’m the owner and creator of Stay At Home Educator, a website about intentional teaching and purposeful learning in the early childhood years. I’ve taught a range of levels, from preschool to college and a little bit of everything in between. Right now my focus is teaching my children and running a preschool from my home. Credentials include: Bachelors in Art, Masters in Curriculum and Instruction.
10 Comments