
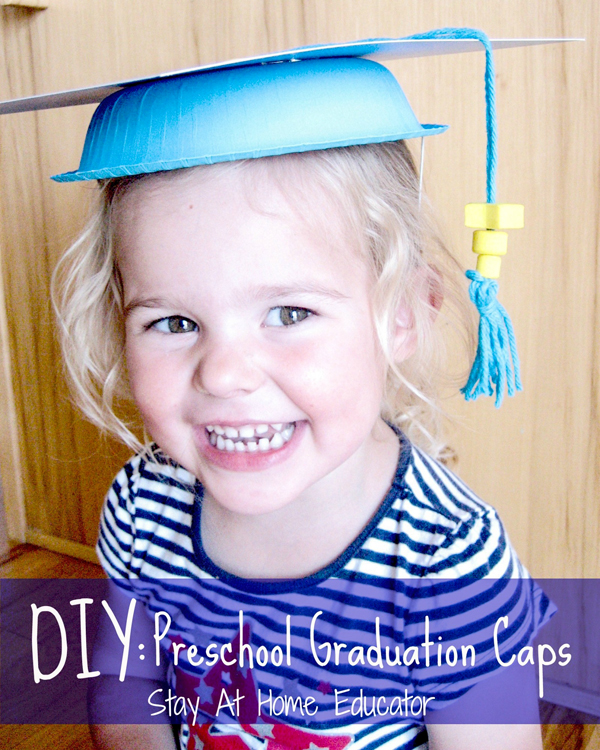
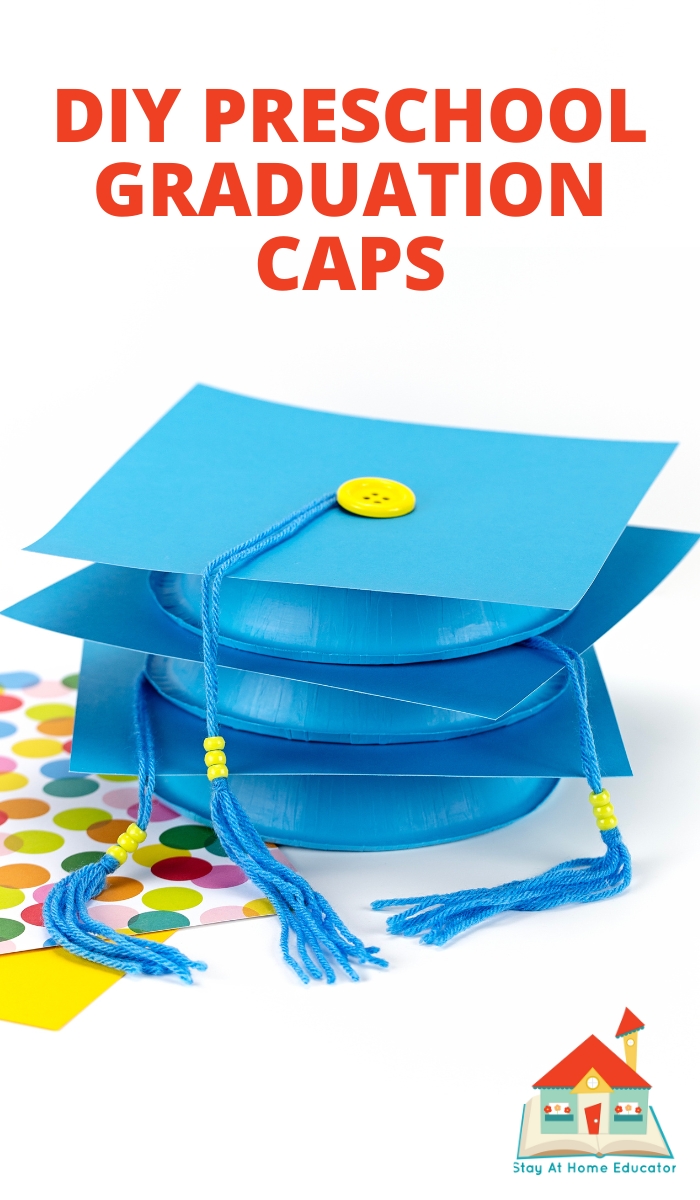
DIY Preschool Graduation Caps Made Easy
It’s finally the end of the school year which also means it’s preschool graduation season! It’s a fun time of year to celebrate all of your preschooler’s accomplishments. What better way to make it special than with these DIY preschool graduation caps.
Easy Homemade Graduation Caps
The end of the school year is packed full of activities!
We focus on wrapping up our preschool curriculum lessons, and take our preschool lessons outside as the weather starts to turn into summer. We host a Mother’s Day Tea and push to make our Father’s Day gifts before releasing for the summer.
Needless to say, the last month of preschool is full of activity.
So, the search for DIY preschool graduation caps began!
Preschool graduation is a big deal for our little learners who are both excited for kindergarten and maybe a little anxious. The best way to make the last week of school special meant having a very special graduation just for our kindergarten bound students.
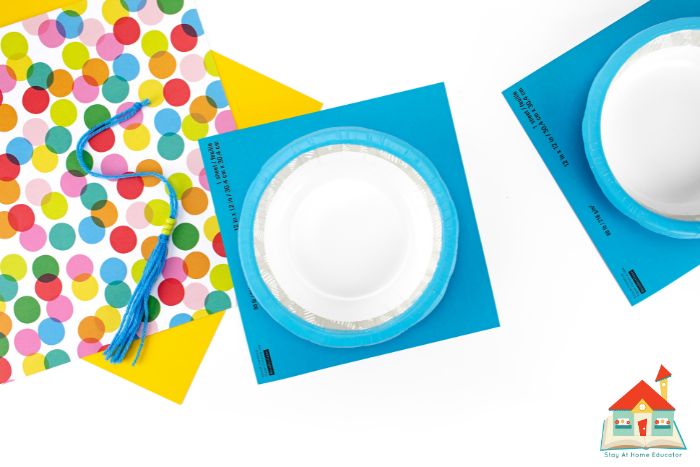
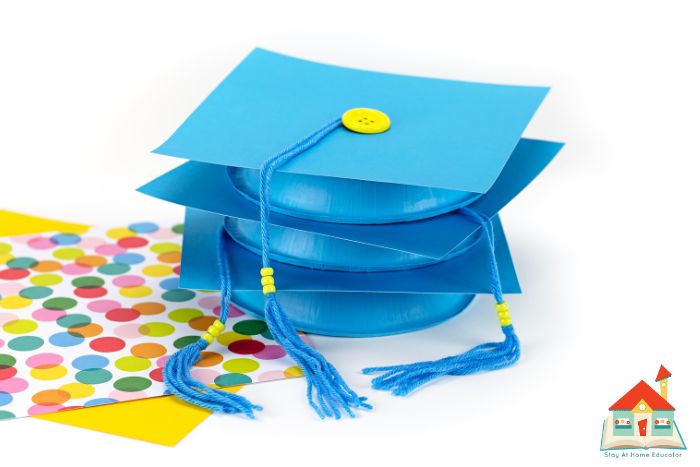
These homemade preschool graduation caps are durable enough for any end-of-the-year preschool celebration.
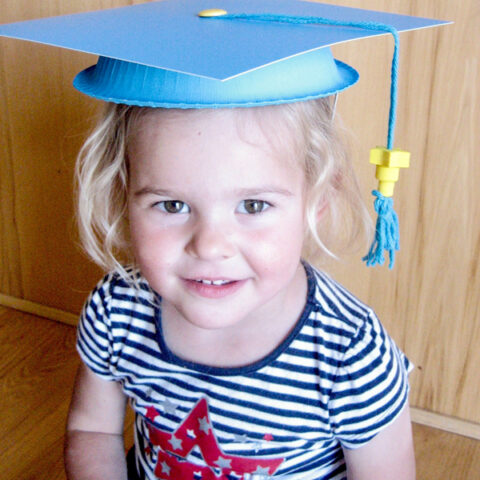
My students were delighted to see their caps, and combined with some T-shirts we had tie-dyed for the occasion, they felt pretty darn awesome! No need for fancy and expensive graduation caps and gowns! These diy graduation caps are just as cute as the smiling preschoolers wearing them.
Related Reading
How to Make DIY Preschool Graduation Caps
These grad caps are a cinch to make when you follow these step by step directions. You just need a few materials that are easily found at your local store, and a good Netflix movie to keep you company while you make them.
Don’t forget that these made great kindergarten graduation caps too. They will fit children up to about eight years old.
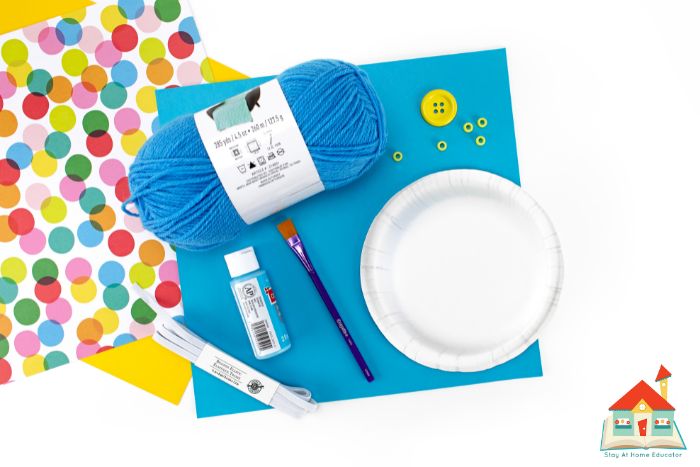
Materials:
- paper bowls
- poster board or heavy card stock
- coordinating color acrylic paint and a paintbrush
- buttons
- string
- beads (optional)
- 1/4 inch elastic
- hot glue
The Quick Steps to Making DIY Graduation Caps
- Paint the bowls to match the chose poster board.
- While the bowls are drying, cut the poster board down to size.
- Make tassels out of string. Add beads if desired.
- Attach the tassels to the top of the cap.
- Attach the elastic.
Step by Step Details of How to Make Graduation Caps
These diy graduation caps made all the different in making our little preschoolers feel like the big kids they are!
Paint the bowls.
Begin by painting the bowls the coordinating color using the acrylic paint. Give each bowl two coats. This will make the paint more uniform and eliminate any brush strokes.
The bowls will be the cap portion of the graduation caps. A larger bowl will help the caps stay on the child’s head better, too.
Alternatively, you can also use a contrasting color of paint, instead of choosing colors that match. You can even offer glitter glue for your preschoolers to make decorated graduation caps.
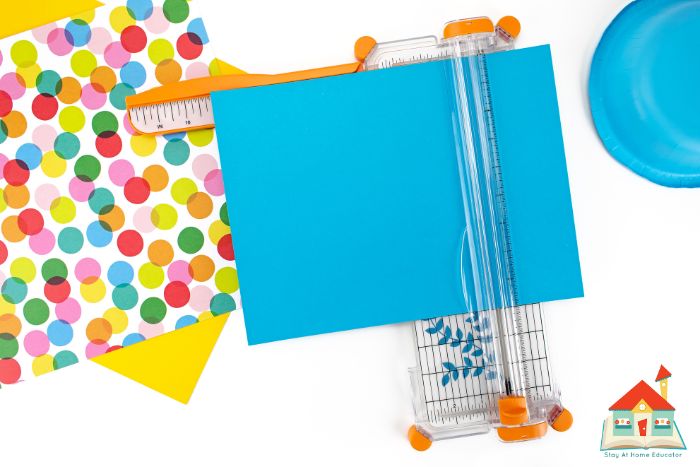
Cut the poster board to size.
While the bowls are drying, cut the poster board down to size. You can either take the poster board to an office supply store and use their giant paper cutter, or you can use a box cutter and a sewing ruler and cutting mat.
Cut each down to 9×9 inches. You should be able to get six pieces out of one sheet of poster board. These will be the tops of the graduation caps.
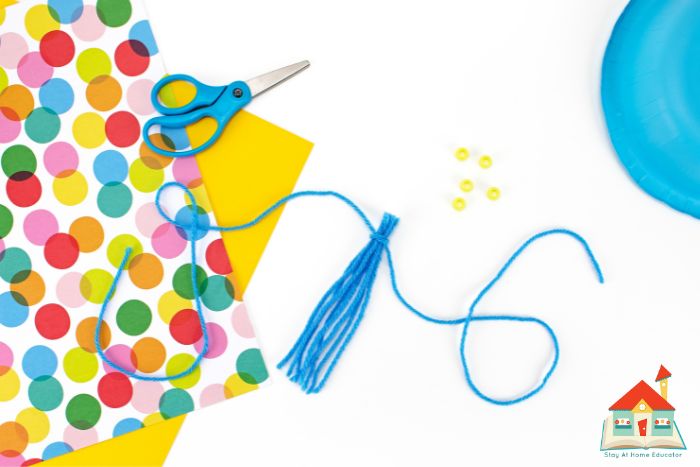
Make the tassels.
No graduation cap is complete without the tassel! Here’s how to make them. (And you can see how in the video on this page, too).
Cut a piece of string about 18 inches long, and a second piece at least three feet long. Fold the three feet piece of string in halves until the overall length is about five inches. Take the longer string, (18 inches) and tie the smaller, folded pieces in the center of the longer string. Use the longer string to wrap around the top of the tassel portion, tie off, and glue so the tassel will hang straight.
Clip the loops of the tassel and cut the strings to length. Add beads if desired. The how to video in this post shows how to make the tassels.
Assemble the graduation cap.
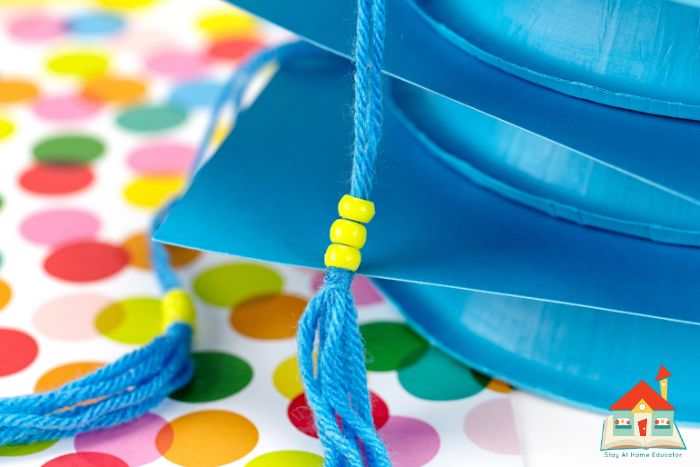
Use hot glue to glue all the pieces together. Mark the center on each side of the poster board with a small dot. Center the bowl onto the 9×9 inch piece of poster board. (Write names or have your students decorate the poster board before gluing).
Cut the tassel string to length. I think mine ended up being about twelve inches. Glue the tassel on the other side of the poster board, over the marked dot. Finish with a button to cover the ends of the string.
Glue elastic on the inside of the bowl, making a chin strap to help keep the graduation cap on. I have found that the best length is one that allows the child to wear the cap without actually having to stretch the elastic much.
If the elastic is too short and has to stretch too much when the cap is on, it could have a tendency to slide forward and off. Although this can usually be countered by tucking the elastic behind the child’s ears.

Now, enjoy the cuteness you have just created…and silly faces.

Does it get better than this?

These caps are especially cute when using school colors. You can pair them with a traditional graduation gown, but instead of a gown we made tie-dyed t-shirt special for graduation day. It was so meaningful for the children because they got to keep their “cap and gown”.
DIY Preschool Graduation Caps
These grad caps are a cinch to make when you follow these step by step directions. You just need a few materials that are easily found at your local store, and a good Netflix movie to keep you company while you make them.
Materials
- paper bowls
- poster board or heavy card stock
- coordinating color acrylic paint and a paintbrush
- buttons
- string
- beads (optional)
- 1/4 inch elastic
- hot glue
Instructions
- Paint the bowls to match the chosen poster board. Paint with two coats, allowing to dry completely in between coats.
- While the bowls are drying, cut the poster board down to 9x9 inches.
- Make tassels out of string. Refer to this YouTube video. Add beads for decoration if desired.
- Attach the tassels to the top of the cap using hot glue. Cover hot glue dot with a button.
- Attach the elastic to make a chin strap.
Notes
Preschoolers can personalize their graduation caps by adding glitter glue, or you can keep them more "formal" and use school colors.
Recommended Products
As an Amazon Associate and member of other affiliate programs, I earn from qualifying purchases.

Summer Learning Printables

I’m Sarah, an educator turned stay-at-home-mama of five! I’m the owner and creator of Stay At Home Educator, a website about intentional teaching and purposeful learning in the early childhood years. I’ve taught a range of levels, from preschool to college and a little bit of everything in between. Right now my focus is teaching my children and running a preschool from my home. Credentials include: Bachelors in Art, Masters in Curriculum and Instruction.
I offered to help one of my child’s teachers and found your awesome idea! I can’t wait to make the caps. Thank you so much for sharing!
They are adorable! I hope those little preschoolers love them!