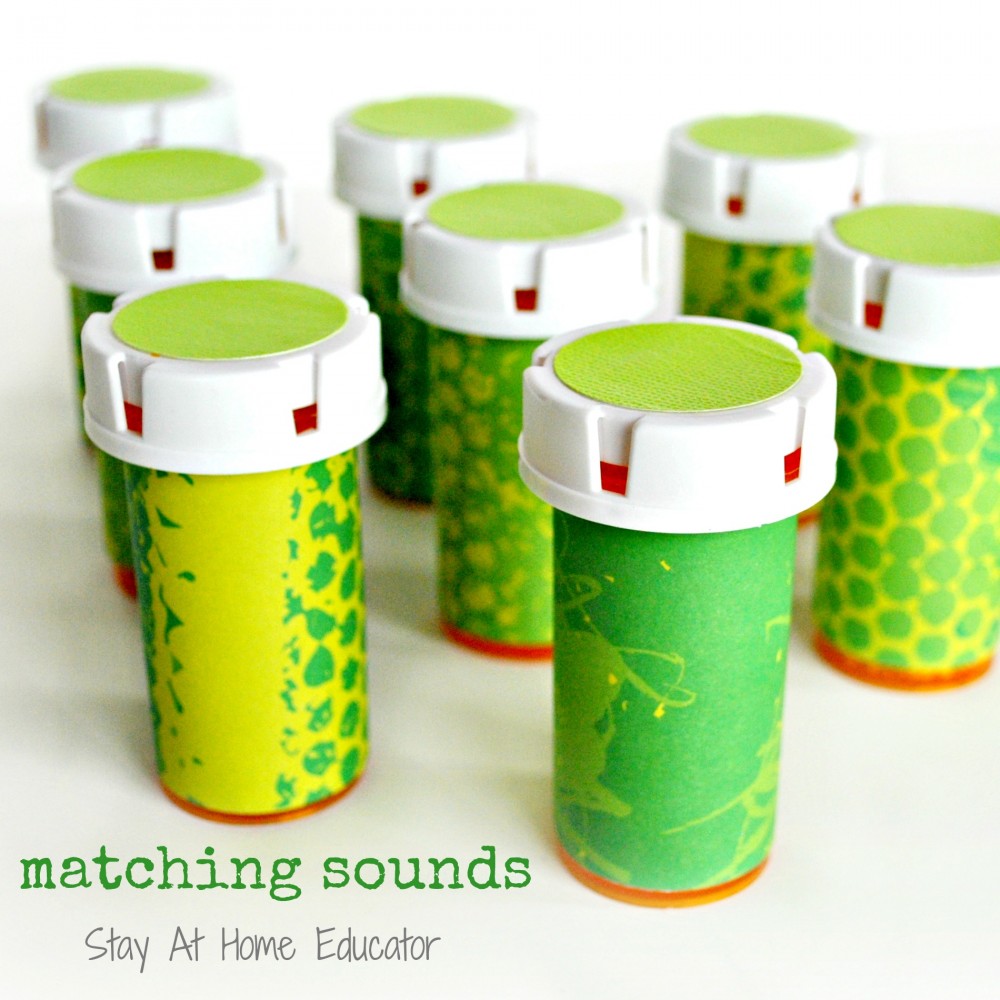
In preschool we have been studying the five senses and this activity, matching sounds, has turned out to be one of the students’ favorites. It is an easy to prepare and creative activity to help students learn about their sense of hearing, teaching them to differentiate between various sounds.
If this is your first time, please join me regularly via E-mail in the right sidebar, Facebook, Twitter @StayAtHomeEdu, and Pinterest.
To prepare these matching sounds bottles, I went to my local pharmacy and pleaded my case as a preschool teacher. My pharmacist gave me ten locking lidded prescription bottles for free with the promise that I would cover the pharmacy labels, which I have done with scrapbook paper. For this activity, it is important to get bottles with locking lids, so that little fingers cannot open them and spill out the contents. This will also help keep items contained during the actual use of the matching sounds bottles. That being said, locking lidded bottles are not fail safe, so this activity should always be supervised by an adult.
To prepare, fill each set of two bottle with a different filler. I used birdseed, buttons, small nuts from the hardware store, pony beads, and a dried apricot pit. Each sound will vary depending on how full the bottle is filled, so test each bottle to make sure the sounds they create when shaken really are different enough for the students to recognize, and be sure to put the exact same amount of filler so the same sound and tone will be produced when shaken.
When I introduced these sound bottles to my preschoolers, I invited them to use their sense of hearing to help me match the sounds when I shook each bottle. I selected a bottle and shook it gently, (and mentioned to my students that only a gentle shake is needed, not a hard, vigorous shake), then gave each student a chance to shake it themselves. I then asked the students to listen carefully as I shook the other bottles to see if they could find the bottle with the matching sound. One by one, we went through each bottle and matched it with it’s companion of the same filler.
Now, I did not put together an “answer key” for this activity. My purpose for this activity was more in the process of listening to the various sounds and using problem solving skills to match them. It was less about the end product. However, should you choose to use an answer key, you can put matching colored stickers on the bottom of the bottle sets. Since the prescription bottles I used are made of a clear orange plastic, technically you can simply look through the bottom of the bottle to see the contents.
Enjoy!

I’m Sarah, an educator turned stay-at-home-mama of five! I’m the owner and creator of Stay At Home Educator, a website about intentional teaching and purposeful learning in the early childhood years. I’ve taught a range of levels, from preschool to college and a little bit of everything in between. Right now my focus is teaching my children and running a preschool from my home. Credentials include: Bachelors in Art, Masters in Curriculum and Instruction.


[…] playing they are learning a lot about their environment and materials. This student below begins by exploring sound as he allows the table scatter to pour from his hands. As he does so, he sings a song about leaves […]